Tuesday, December 23, 2008

Ma's Peppermint Cocoa Cookies with White Chocolate Chips

These cookies are an original concoction put together by my mother and I this holiday season. I was never a big fan of peppermint and chocolate together until Cass brought over these brownies (a variation of Swistle's Brownies) and I died. Dead from yummy goodness. I kind of forgot about my love of this combination until Starbucks started with their Peppermint Mocha Twists. I died again. So I began my hunt for anything in this combination and craved it like I was pregnant again. Ice cream, candy, anything.

So while we were doing our yearly tradition of cookie baking, we came up with this recipe and Oh. My. Dog. It's kind of like a chewy thin mint.

So if you have these ingredients or are planning a trip to the store, pick up the stuff and make them for Christmas. Bring them to a friends' house. You WILL NOT be sorry.

What you need:
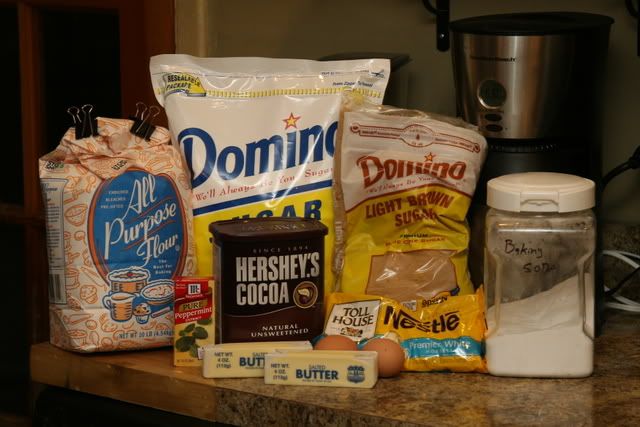
Photobucket

1 sticks of butter
3/4 c. white sugar
2/3 c. brown sugar
1 tsp. vanilla extract
2 eggs
1 tsp. peppermint extract
3 tbsp. unsweetened cocoa poweder
1 tsp. baking soda
1 tsp. salt
2 1/4 c. flour
1 pkg (12 oz) white chocolate chips.

What you do:

-Mix dry ingredients in separate bowl. Set aside.
-In a mixer, beat butter and sugars until light and fluffy
-Add in extracts and eggs.
-Gradually add in dry mixture.
-Spoon onto cookie sheet and bake at 350 for 10-12 minutes or until done.

Some things of note:
-Personally, I always take out my cookies a minute or two before they are "done" and let them sit on the cookie sheet for 3-5 minutes before putting them on a cooling rack. This lets them finish cooking out of the oven so you get that gooey middle.
-Make sure you don't use more than the 1 tsp of peppermint. It is STRONG and any more than that and it overpowers the flavor. If you want more mint, try using crushed candy cane pieces sprinkled on top.
-You can most definitely substitute the white chips for regular chocolate chips or even the swirled ones. You can use none at all. Get creative!

Enjoy!

Photobucket

Wednesday, November 26, 2008

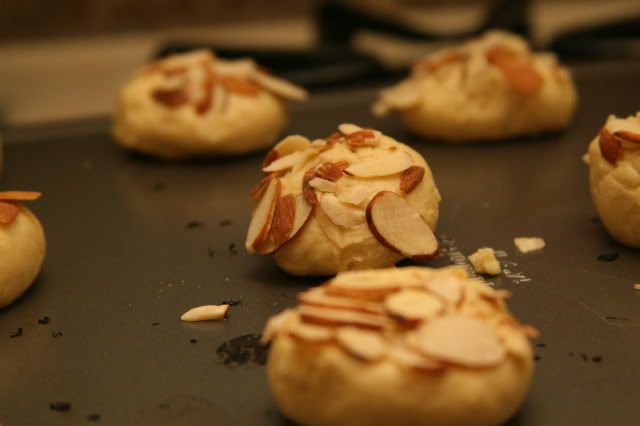
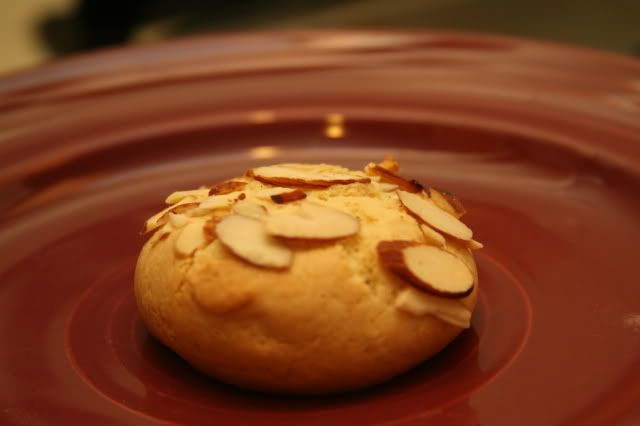
AndreAnna's Almond Cream Cheese Cakesters

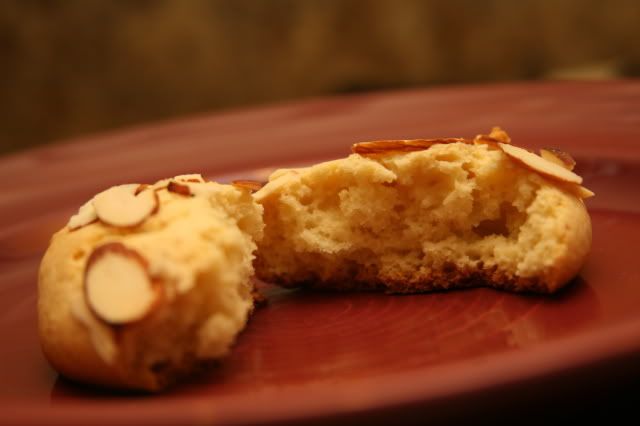
This was my very first recipe that I came up with solely on my own. I didn't copy or improvise. I decided what I wanted and made it. And it worked, so yay! They are cakier than cookies but cookier than cake. Hope that made sense. These are a great light holiday desert, perfect with coffee/tea.

What you need:
1 stick butter, softened
1/2 tube (7 0z) of almond paste
1 c. white sugar
1 pkg. (8 oz) cream cheese, softened
1 egg
1/2 tsp. vanilla extract
1 tsp almond extract
2 1/2 c. flour
1 tsp baking soda
1 tsp salt
1 c. sliced almonds

What you do:
-Preheat oven to 350.
-In a bowl, mix together the flour, baking soda, baking powder, and salt.
-In a separate bowl (I use my Kitchen Aid for this) beat butter, almond paste, and sugar until well-blended.
-Add in 2 eggs and beat.
-Add in cream cheese and beat together until light and fluffy
-Add in bowl of dry ingredients and beat until blended.
-Put batter in fridge for at least an hour to firm up. Otherwise, rolling into balls s very difficult.
-Once chilled, roll batter into small balls and smush one end into a plate of almond slivers. Please almond-side up on cookie sheet.


Photobucket

-Bake for 15-18 minutes or until starting to brown on the egdes.
-Enjoy!

Photobucket

Photobucket

Monday, October 13, 2008

Dinner + Lunches

I've been cooking up a storm while wearing Lexi in a Moby so photography has had to go....but the cooking is still happening. My plan is make an easy dinner and use it to make a different lunch sometime in the future.

Dinner in the Crockpot: Roast
1 Cheap Cut of Beef Roast
1 Beer
1 Packet French Onion Dip Mix

Put all that stuff in the Crockpot on Low. Ignore for 6-8 hours. Two hours before serving I added:
2 chopped Sweet Potatoes
20 Baby Carrots (I didn't count you silly gooses)
1 Large Onion chopped
1 Package of Baby Bella pre-sliced Mushrooms

Serve. Yummy. Freeze the leftover meat and broth in a big Pyrex.

Lunch two weeks later: Beef n Barley Soup
Thaw the Meat and Broth
6 Cups Low Sodium Beef or Chicken Stock (I used half and half because that's what I had)
1/2 Cup Barley

Simmer for 40 minutes.
Add in Sliced Carrots, Celery, Onion and your thawed Meat and Broth.

Serve. Yummy. With Grilled Cheese. Delish!

Thursday, September 25, 2008

Adventure in the Crock

The Crock Pot that is. So today I did this:

1 Jar of Red Sauce
15 Chicken Tenders Raw
2 Cans of White Beans
1 Package Frozen Spinach
1 Onion
1 Can of Diced Tomatos

I put it on low. I put it on top of Brown Rice but I dream of putting it on top of some cheese filled pasta that magically doesn't add calories to my diet and thus make my pants not fit. I don't live in Disney where calories do no exist so I put it on Brown Rice. It's DELICIOUS. Now what do I call it?

Sunday, September 21, 2008

Pumpkin Apple Bread

This recipe comes from Kristin, who made it from a Weight Watchers recipe. It sounds so great and yummy for a fall day!

What you need:
2 cups all purpose flour
1/4 cup + 1 tsp granulated sugar
1 tsp baking powder
1/2 tsp baking soda
1/2 tsp salt
1/2 tsp cinnamon
1 large egg
1 cup low fat buttermilk
1 medium apple, peeled, cored and grated
1/2 cup cooked pureed pumpkin or canned pumpkin puree
1 tsp confectioners sugar

What you do:
Preheat oven to 350. Spray a loaf pan with nonstick cooking spray.

In a large bowl, combine the first 6 ingredients.

In a small bowl, beat egg; add buttermilk, apple and pumpkin.

Add egg mixture to flour mixture and mix just until blended. Do not overblend.

Spoon into prepared pan and bake about 1 to 1 1/4 hours, or until a toothpick inserted near center comes out clean. Cool for ten minutes in pan; turn out onto a rack and cool thoroughly. Dust with confectioners sugar and serve.

Makes ten servings. Per serving: 156 calories, 4g Protein, 2g Fat, 30 g Carbohydrate, 262 mg Sodium, 23 mg Cholesterol, 2 g Dietary Fiber

Friday, September 19, 2008

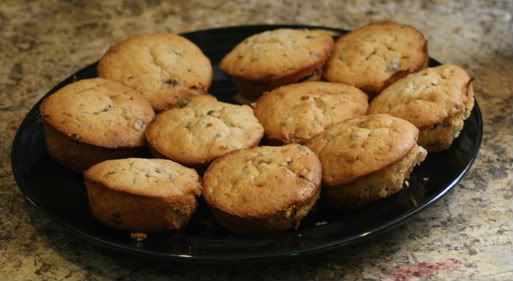
Fig Cranberry Muffins

This morning, I twittered that I had a bunch of figs from the farmer's market that I just could no longer eat. I'm the only one in the house that will eat them fresh and raw. My 31-year old husband won't eat them because he thinks they look like zombie guts and my toddler is currently on a plum kick and anything else is crap.

I went on a hunt for a recipe I could make with them. Normally, I'd love to stuff those little sons of bitches with goat cheese, some fresh herbs, and bake them. But again, I'd be the only one to eat them and there was quite a bit of figs left.

So I came across a few different recipes for fig bread, fig loaf, etc., and many of them required things I don't have in the house: vegetable shortening (um, ew, how 'bout "no" Scott?), buttermilk, the blood of a goat. I was forced to concoct my own using a few different ones for ideas.

And they were well worth the mini-stroke I had when my toddler put her little plastic mermaid in the Kitchen-Aid while it was on.

Photobucket

What you need:
6 tbsp butter, softened
2/3 c. white sugar
1/3 c. brown sugar
1 large egg
1 1/2 tsp baking powder
1/2 tsp. salt
2/3 c. milk
1 3/4 c. all purpose flour
2 tsp vanilla
1/2 tsp. allspice (or nutmeg)
1/2 tsp. cinnamon
1 c. figs, chopped very finely or pureed
1/2 c. dried cranberry (I used 1/4 c. cranberry and 1/4 c. currants if you have those)

What you do:
-Mix the butter and both sugars until fluffy
-Add in the egg, vanilla, and spices
-In a separate bowl, combine the flour, baking powder and salt
-Gradually add in the dry mixture to the wet, alternating with the milk.
-Fold in the figs and cranberries
-Spoon into 12 muffin cups
-Sprinkle a little brown sugar on top if you like the crumbly texture on top of muffins
-Bake at 350 for 20-30 mins or until passes the toothpick test and slightly browned

These muffins come out slightly crispy on the outside and so soft and moist inside. Perfect for the fall!

Photobucket

Sunday, September 14, 2008

Leftover Ham Casserole

This post has been brought to you by Multi-Tasking Mommy.

Even when I buy half of a boneless ham, it seems we are left with leftover ham for days and we end up getting sick of it!

I have finally come across a great recipe to solve this problem. I can make it and freeze half of it for another time.

This is yet another casserole that has been added to my freezer for when after the baby is born. Let's hope the baby isn't super sensitive to onions!

Recipe from: Enjoy: More Recipes from the Best of Bridge, page 141.

Ham Casserole

1 cup cubed cooked potatoes
1/2 cup chopped onions
2 Tbsp butter
3 Tbsp flour
1/2 tsp salt and pepper to taste
1 1/4 cups milk
1/2 cup shredded cheese (I use cheddar, but recipe calls for swiss)
2 cups cubed cooked ham (or more)
1 1/2 cups soft bread crumbs (I omit these)
2 Tbsp butter

Cook onions in butter in skillet, blend in flour, salt and pepper. Add milk slowly. Cook until thick. Add cheese and melt. Add ham and potatoes--mis and pour into casserole dish. Sprinkle with bread crumbs and dot with 2 Tbsp of butter. Cook at 400 for 30 minutes until bubbly.

Saturday, September 13, 2008

I Love a Good Apron

I like aprons. A lot. I love them in fact. I like how I feel all June Cleaver when I wear one. I love how I wipe my hands all over it and I stay clean. I love that I kind of feel closer to my Grandma Teresa when I wear one - my Gram was a big fan of the apron. I've had many aprons over the years - I have a super chic one from Japan from a former colleague of mine, one I bought at Anthropologie my first visit ever into the big island of Manhattan, some of my grandma's homemade ones. This one is super cute and it's being given away - check it out. And if you don't win I think ordering one is PERFECTLY sensible because that's exactly what I intend to do!

Thursday, September 11, 2008

Crank to go with the Crack


So I think I mentioned that I'm back on the Crack....well Coffee. Crack/Coffee same diff. Well I have found the legal Crank to go with my Crack. Refrigerated Nestle Mini Brownie Cookies. If you have willpower and eat just one it's under 50 calories. Crank people. Crank I tell you. Run to target, get them and live in bliss.

And before you say thank you let me say this. YOU are SO welcome.

Beef Stroganoff

This post has been brought to you by Multi-Tasking Mommy.

As I'm gearing up for this baby to come, I am rapidly preparing casseroles and throwing them in the freezer.

I have been preparing regular dinners for the fam and then freezing half in a casserole dish for October.

One of my favourite meals is Beef Stroganoff. You can make it with meatballs or cut up pieces of beef, your choice.

The recipe that I follow is from ENJOY: More Recipes from the Best of Bridge, page 140-141.

Stroganoff

Meat Balls
2 lbs ground beef
1 1/2 cups bread crumbs
1/4 cup milk
1/4 cup chopped onion
2 eggs, beaten
1 tsp salt
pepper to taste

Combine all ingredients in large bowl. Mix well and roll into balls of desired size. Place on edged cookie sheet and bake at 375 for 25-30 minutes. Remove from oven, drain and set aside.

Sauce
1/2 cup chopped onion
4 Tbsp butter
2 Tbsp flour
2 Tbsp ketchup
1 10oz can consomme (undiluted)
1 cup sour cream

Brown onion in butter, add flour, mix well. Add ketchup and consomme, cooking slowly until thickened. Add sour cream, then meat balls. Place in casserole and heat in 300 degree oven until serving time.

Thursday, September 4, 2008

Fruit Muffins

This recipe has been contributed by Multi-Tasking Mommy.

Can you tell that I've been craving baked goods lately? First strawberry bread and butter, then fruit crisp and now yummy muffins! That's right, these muffins are yummy. I will not even attempt to convince you that they are "healthy", even though they do have a whole cup of fruit in them ;)

When strawberries were in season, I made these muffins one Saturday morning and I think they were almost all gone by lunch time!

This time around, used peaches and they were super yummy again, although admittedly they would have been a bit tastier if the peaches had been a bit sweeter.

Fruit Muffins

2 cups flour
3 1/2 tsp baking powder
1/2 tsp salt
1/2 cup sugar
1 egg, lightly beaten
1 cup milk
1/3 cup melted butter
1 tsp vanilla
1 cup chopped fruit

Topping
2 Tbsp white sugar
1/4 tsp cinnamon

In a large bowl, mix together flour, baking powder, salt and sugar and chopped fruit. It is important to mix well, covering all of the fruit before adding the wet ingredients.

In a separate bowl, combine the egg, milk, vanilla and melted butter. Add this to the dry ingredients, stirring just until moistened.

Put batter into muffin cups and sprinkle topping onto each muffin.

Bake at 375 for 20-25 minutes, until tops have browned slightly!

Friday, August 29, 2008

Fruit Crsip

This recipe has been contributed by Multi-Tasking Mommy.

First, it was strawberry season and we had so many strawberries, we didn't know what to do with them. Now, we have moved on to peaches! There are baskets of peaches everywhere I look, it seems!

What better way to use up some peaches than to make a good, old Peach Crisp?

I've called this recipe "Fruit Crisp" because you can really use any type of fruit you like! Sometimes I make apple crisp, sometimes peach and sometimes I add berries as well.

Fruit Crisp

Fruit: Slice fruit directly into baking dish (you can use whatever sized oven safe dish you like--just add enough fruit to fill it to your liking. Add sugar if desired and 1 tbsp of instant tapioca granules.

Topping:
Combine 1/3 cup margarine or butter and 1 cup of flour
Add:
1/2 cup brown sugar
1/4 tsp salt
1/2 tsp each of cinnamon and nutmeg
You can add large flake oats if desired!

Bake at 425 degrees for approximately 25 minutes or until fruit is bubbling and topping has "crisped"!

Enjoy :)

Sunday, August 24, 2008

Sunday Morning Popovers

This recipe comes from Pocklock. She's like 13 months pregnant. Go visit her and wish her well!

----

I am no chef. In fact, I am a self proclaimed disaster in the kitchen. I can rarely escape without burning something and most of the time that something, is me.

However, I dream. I dream about being able to cook real meals. To made scrumptious desserts. And that’s why I often visit Chop. Stir. Mix. In hopes of finding something simple and easy enough that even me, World Class Kitchen Loser, can make. I thought about how, since you’re never really alone in the blog world, maybe there’s someone else out there looking for the same.

The below recipe comes from my sister-in-law. She made these popovers for a holiday brunch a few years ago and as I sat there drooling over them, I imagined how hard they must’ve been to make. I thought about how she must’ve been up at 4am before her kids because she’d need the house perfectly still to get them to actually POP OVER. (Heh. Yes. Am that dumb.) I was so wrong. She claimed that they were the easiest things to make. And after accusing her of lying to me, she showed me the recipe. People? I have successfully made popovers more than one time. MORE THAN ONE TIME! Mah medal, let me show you it.

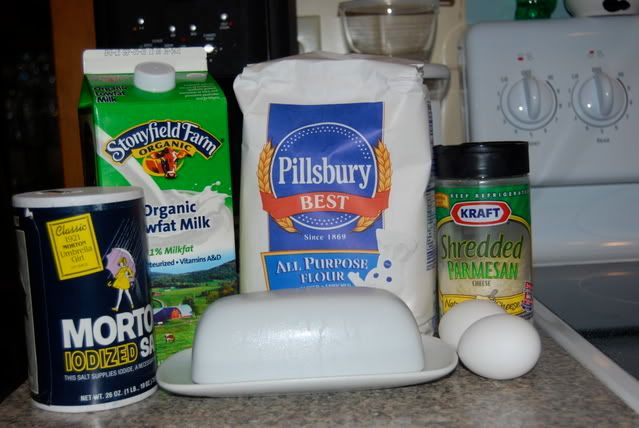
Gather your stuff:
Photobucket

1C of milk (for a lower calorie version, use skim)
1T melted butter
1C Flour
¼ t of salt
2 Eggs
Parmesan cheese (optional)
(makes 10 – 12 Popovers)

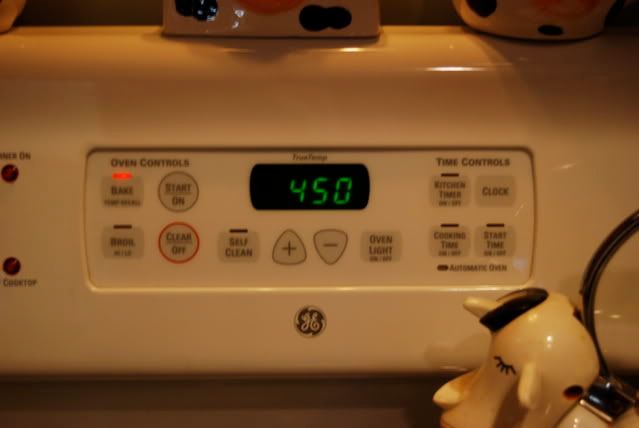
Preheat oven to 450 degrees.
Photobucket

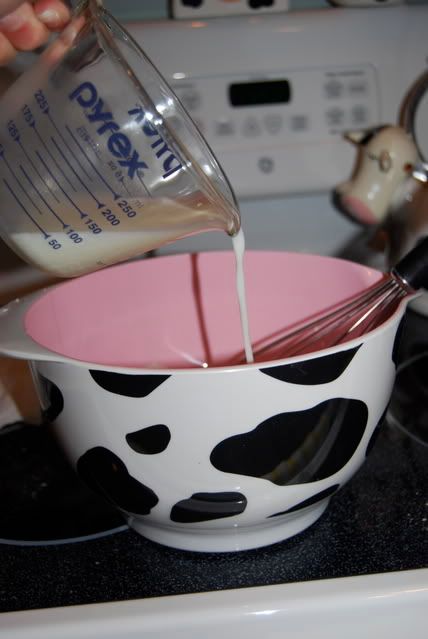
Mix together all your ingredients except the cheese. In no particular order what-so-ever!
Photobucket

The mixture will be very watery.

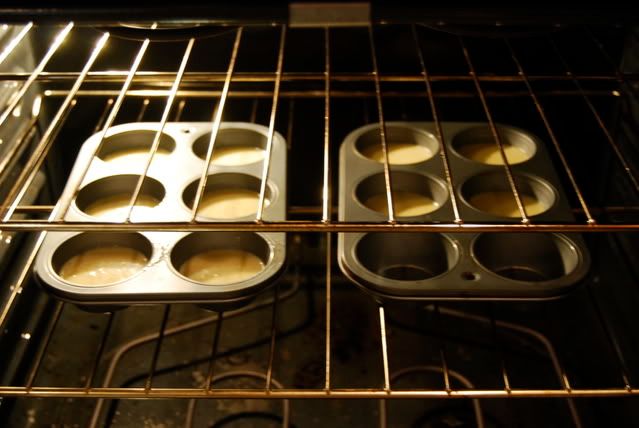
Grease your muffin tins (I used Pam, but you can use whatever method you prefer) and fill each muffin spot ½ - ¾ of the way full with the mixture. Sprinkle the cheese on the top of each mixture. Place tins in oven.
Photobucket

Now, if this recipe was AT ALL tricky, this next step would be the place to screw up.

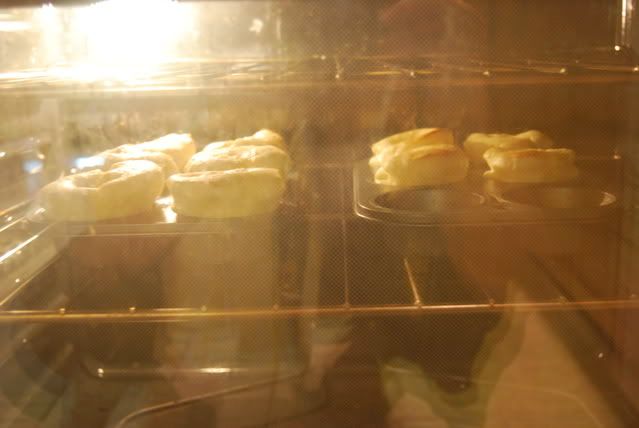
After they bake at 450 for 15 minutes, you have remember to turn down the heat on the oven to 350 and then bake for 20 more minutes.

The pans should look like this when you turn down the heat:
Photobucket

The reason why this part scares me a little is because I’ve been known to start cooking something and then forget about it. Let’s not talk about the time I boiled eggs for an hour. Ooops.

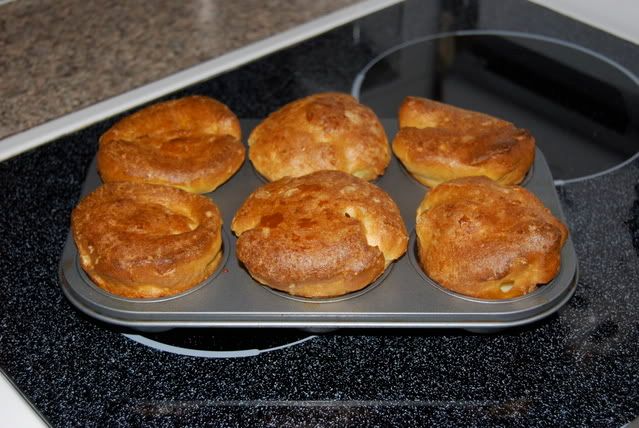
After your done baking, remove the pans from the oven and let cool for a few minutes.
Photobucket

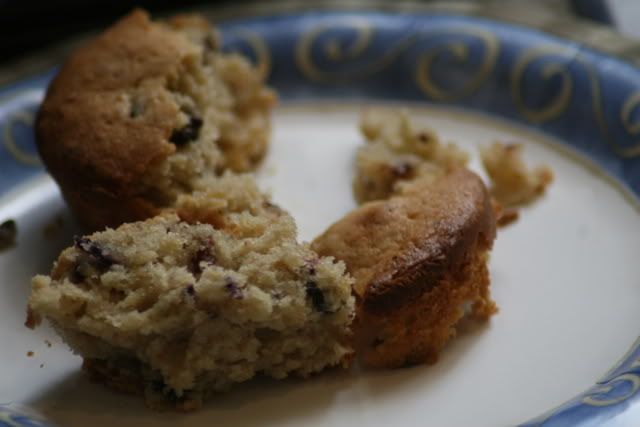
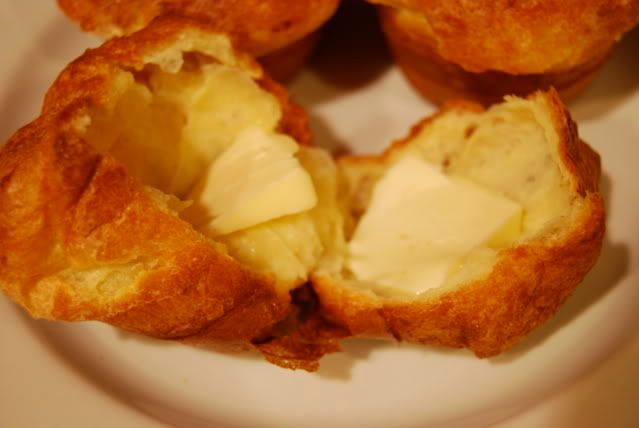
Don’t let them cool TOO long because they are really best and awesome when they’re still warm on the inside.

There’s very little butter in the recipe which keeps the fat content pretty low. But if you’re like me and happen to enjoy fat content, you put lots of butter on them when you eat them. Because, NOMNOMNOM.
Photobucket

Enjoy!

Thursday, August 14, 2008

Sugar Free Pumpkin Custard Pie (WW** Friendly)

Okay, so I realize it's not technically pumpkin pie season, but to that I say: Who Cares? My husband's father and my mother are both diabetic, so I've come up with some pretty inventive recipes for pies and desserts over the years that they could enjoy just like everyone else.

I made this a couple weeks ago just because I saw a can of pumpkin in my basement pantry and decided to.

Also, since having my son, sugar is not my friend and immediately sends weight to Mah Belleh, so this is a great option for something sweet without the actual sugar.

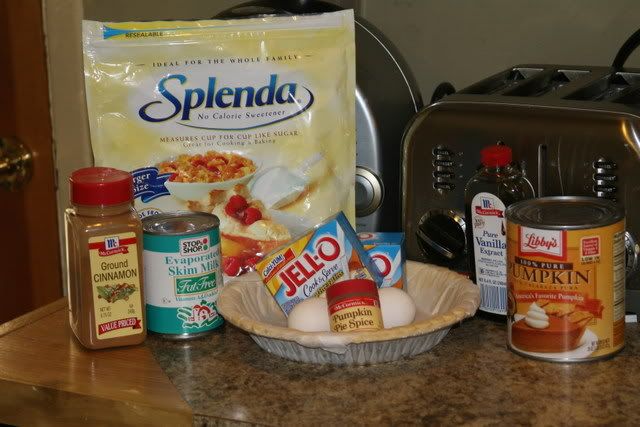
What you need:
Photobucket

1 Pillsbury frozen pie crust
1/3 c. water
2/3 c. splenda
(2) TWO 0.8 oz pkgs of Jell-O Cook N Serve Sugar Free Fat Free vanilla pudding.
3/4 c. evaporated skim milk
1 ½ c. canned pumpkin (not the pie filling)
2 large eggs
1 tsp each of cinnamon, nutmeg, pumpkin pie spice, and vanilla

Directions:
1) Combine water and splenda in a saucepan. Bring to a boil, then simmer on low for 5 minutes. Let cool.
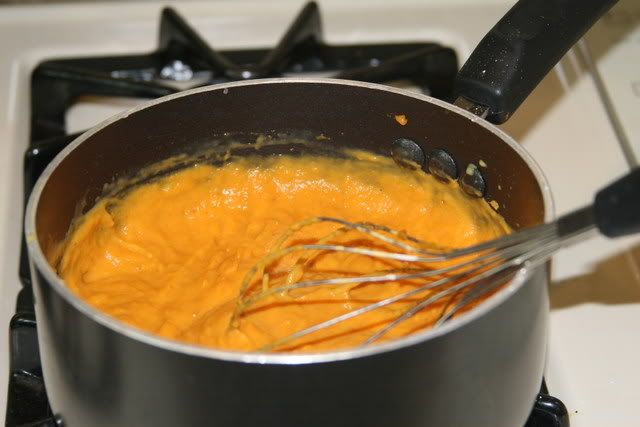
2) Whisk the two packages of dry pudding mixture in. The consistency will be extremely thick and "goopy". This is okay.
3) Beat the two large eggs and whisk them into the mixture.
4) Add the evaporated skim milk and pumpkin.

Photobucket

5) Add spices and vanilla.
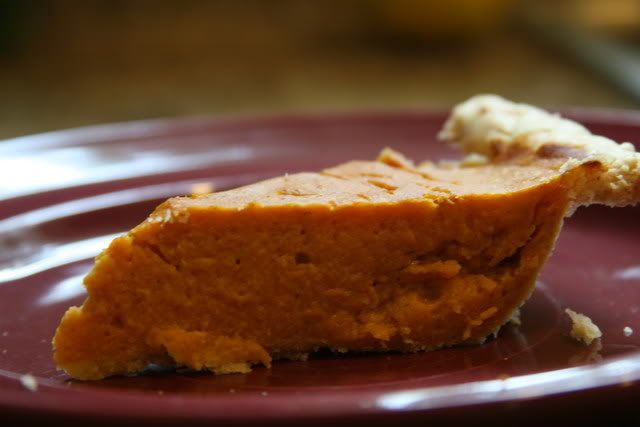
6) Pour into pie crust and bake @ 350 deg for 30-35 minutes or until center is firm.

Note: if you want, you can brush the bottom of the pie shell with egg whites and bake quickly for 5 minutes before pouring in crust. This helps form a "seal" on the crust.

Photobucket
(I realize this isn't the best picture but the pie crust was old and in the freezer too long and as a result broke apart easy)

-You can serve with Sugar free coolwhip as well.

**This is 2.5 pts for 1/8 pie. If you use egg beaters instead, it becomes 1.5 pts/piece

Tuesday, August 5, 2008

One handed food options

Breastfeeding has so many benefits for everyone, blah blah blah, let's talk about how damn hard it is to consume food when you've got someone attached to your chest - it's so difficult! I've been doing really well consuming whole foods and keeping things healthy and I started going through my recipe book filled to the brim with magazine recipes over the past 10 years looking to see what I could make that really is one handed eating. I have a feeling my posts will be along these lines at least for the next few weeks. So healthy & one handed eating it is. If you have a recipe that fits this bill I would love it and would love to post it here so just e-mail me at cassjustcurious at gmail dot com.

Whole Wheat Pasta Salmon Salad


What you need:
Whole Wheat Pasta (however number of servings you're making)
Salmon (I roasted extra lemon salmon last night for dinner last night)
Very finely chopped Red Onion (as much as you like)
A bit of Fresh Dill (fresh is way better)
Very thinly sliced Cucumber
Capers (if you like them)
Salt & Pepper to taste
Plain Yogurt Strained over night or Low Fat Mayo or Greek Yogurt

What you do:
Cook the pasta and soak in cold water to cool the noodles to room temperature - if you keep them room temp the mayo/yogurt will distribute more evenly then ice cold pasta. Mix in your cooked flaked salmon and then add in the onion, cucumber, dill and capers. I put the lid on the pyrex container and shake it to get things distributed. Then I add the Yogurt or Mayo - today I made it with Low Fat Mayo and Greek Yogurt mixed together to keep the health factor up. Put the lid on again and shake and chill.

I made mine to have as lunch so I used an even pasta to salmon ratio to keep my protein intake up and I happen to love cucumber so I use lots of it. I don't have exact measurements here because I tend to eyeball it. This is an easy to eat lunch because the stuff stays on the fork and as I've tested today does not drip on to babies head while breastfeeding.

Strawberry Bread and Butter

This post has been brought to you by Multi-Tasking Mommy.

I know that we are past strawberry season, but I wanted to be sure to share this yummy recipe with you. My Mom makes it every year during strawberry season and it is delish! I would almost call this comfort food.

Strawberry Bread
2 cups flour
1 1/2 cups quick oats
1 tsp of each cinnamon, salt, baking soda
1/2 tsp baking powder
3 eggs
1 cup sugar
1 cup vegetable oil
1 tsp vanilla
2 cups crushed strawberries (4 cups whole)

Mix all dry ingredients except sugar. Beat eggs, sugar, oil and vanilla; stir in dry ingredients just until mixed. Add berries and gently stir.

Pour batter into 2 greased and floured loaf pans. Bake 375 for 45-50 minutes.

Strawberry Butter
1/2 cup butter, softened
2 tbsp icing sugar
1/4 cup crushed strawberries

Beat butter until light and creamy. Beat in sugar and then strawberries.

Spread on bread and enjoy!

Saturday, August 2, 2008

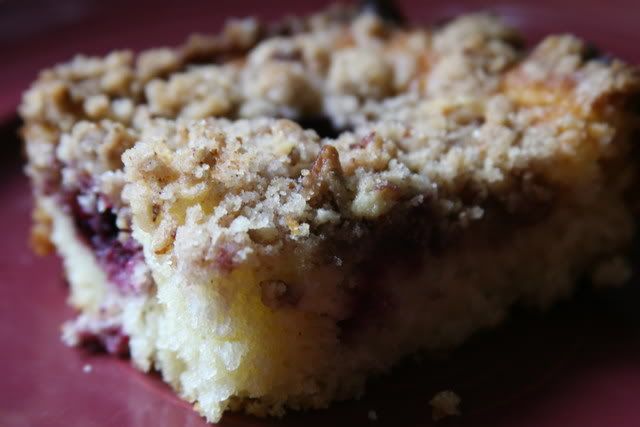
Blackberry Crumb Cake

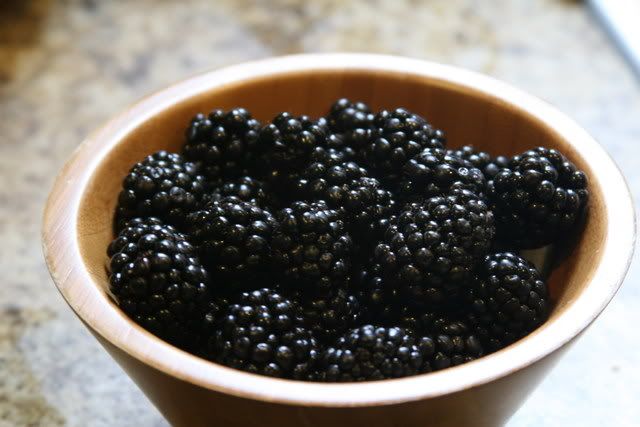
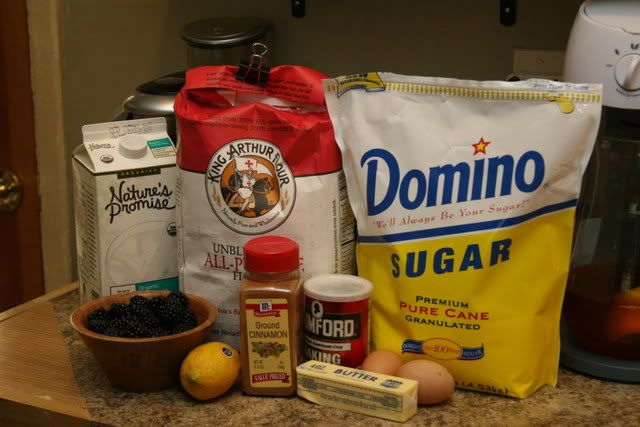
We belong to a Community Supported Agriculture (CSA) where each week, we get a share of a local farmer's organically grown produce. The past two weeks we've been able to pick our own blackberries, leaving me to come up or find some recipes to make with them. Look how fresh and yummy:

Photobucket

So, I searched and tweaked and present you with BLACKBERRY CRUMB CAKE:

What you need:

Cake:
2 c All-purpose flour
2/3 c Sugar
3 tsp Baking powder
1/2 tsp Baking soda
1 tsp. Salt
2 Eggs
1 c Milk
1 stick butter, melted
2 tbsp. Lemon juice (about one lemon)
2 c. fresh blackberries

Crumbs:
2/3 c Sugar
1/2 c All-purpose flour
1/2 tsp. Cinnamon
4-5 tbsp. butter, softened
1 c Chopped nuts (I used pecans, but walnuts and other nuts would work as well)

Photobucket

-Preheat oven to 375
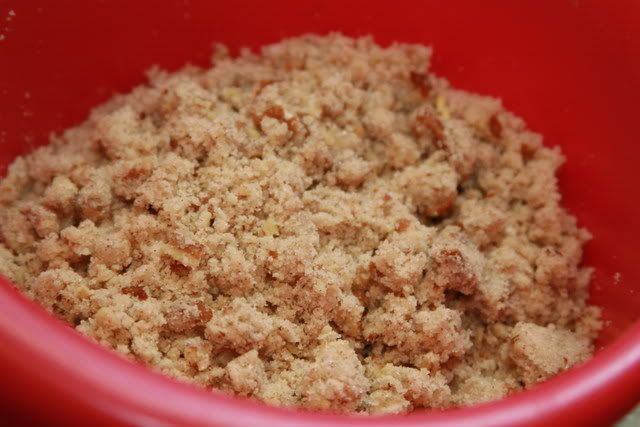
-Make the crumbs by combining all the ingredients with a fork until soft but still crumb-like. It should look like this:

Photobucket

To make the cake:
1) In one large mixing bowl measure the flour, sugar, baking powder, baking soda and salt. Stir well to blend.

2) Into another cup, combine eggs, milk, butter and lemon juice (In that order - otherwise, the hot butter will cook the egg a bit).

3) Stir liquid ingredients into dry ingredients until blended. Batter will be very airy - like biscuits.

4) Turn into buttered 13-by-9-inch baking dish.

Photobucket

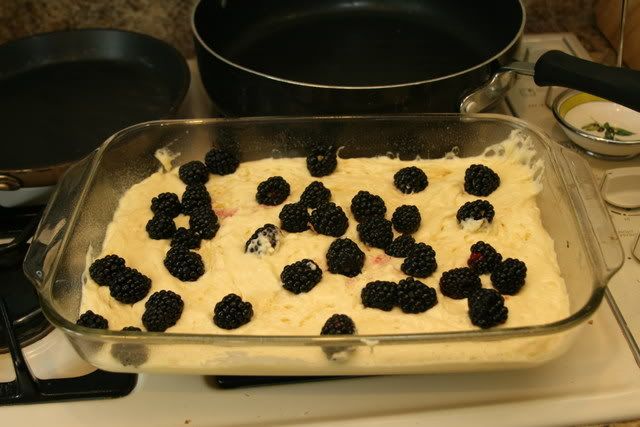
5) Sprinkle berries evenly over the batter.

Photobucket

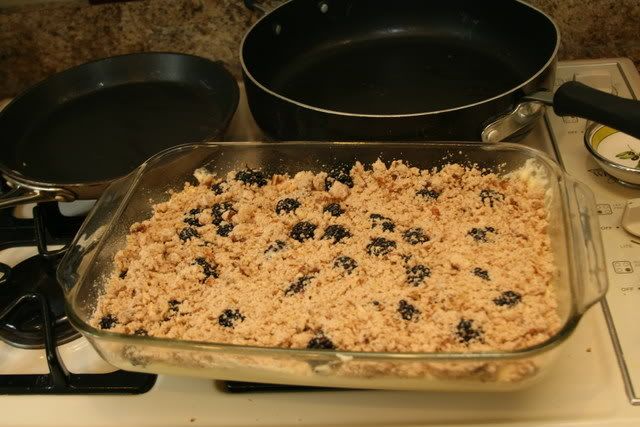
6) Sprinkle with the Crumb Topping.

Photobucket

7) Bake for 30-40 minutes or until it passes the toothpick test.

8) EAT

Photobucket

Monday, July 28, 2008

Baked oatmeal

Strong Enough for An Amishman but Made for a Woman


This recipe comes courtesy of Pomjob

-----

I grew up like five minutes from the famed Amish County, U.S.A., where baked oatmeal is a cornerstone of the breakfast table (at least according to all the area bed & breakfast establishments). I don't remember my first encounter with the delectable dish but I remember rediscovering it a couple years ago when I went to a new breakfast hotspot in my hometown. In an area where men (i.e., my brother-in-law) really do wear shirts reading "Vegetarian is Just Another Name for Bad Hunter," there are few options if you're not of the meat and egg-loving persuasion. Out of desperation, I decided to try the baked oatmeal and it was heaven on a spoon.

My recipe for baked oatmeal has been different every time because I always modify a recipe I find online, but I never write it down. Thank you, Chop.Stir.Mix, for the opportunity to write down my latest variation for posterity.

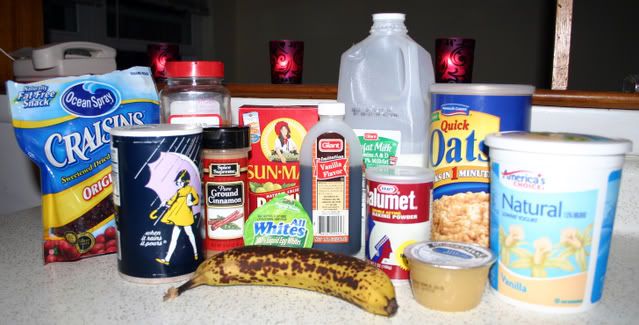
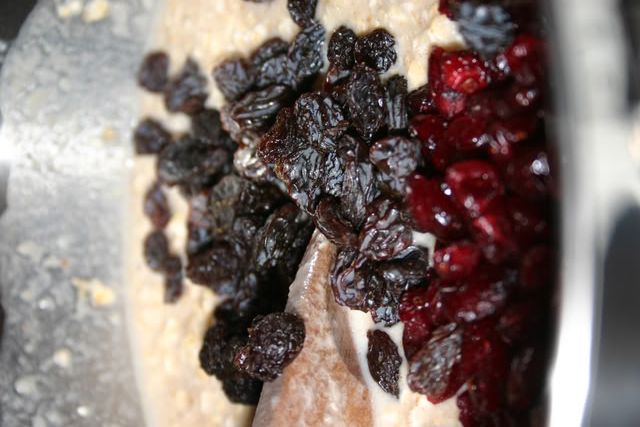
First, gather your ingredients. I like short, sweet recipes so don't let this list intimidate you. You can mix and match; this is my first time trying it with banana, usually I chop up an apple but I was fresh out. I tried to make this healthy so I substituted applesauce and yogurt for oil. Craisins are my newest foodsession so I tossed in a handful; you can try walnuts or pecans, too. It's so versatile.

Photobucket

3 c oatmeal (regular or quick oats)

Dash salt (optional)

1 t cinnamon (I'll use more next time)

½ t nutmeg

2 t baking powder

¼ c brown sugar

½ c applesauce

½ c lowfat vanilla yogurt

2 eggs (or the equivalent)

1 ½ c lowfat milk

Dash of vanilla

1 mashed banana

½ c raisins

½ c Craisins

Photobucket

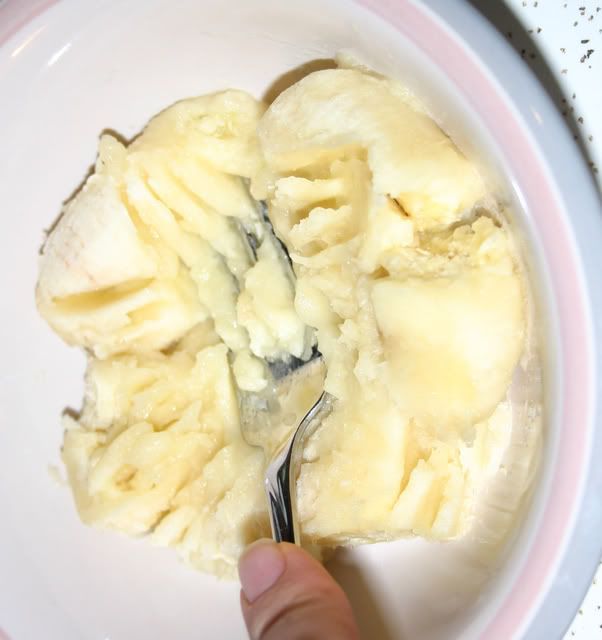
Get that banana good and smashed (enlist a kid to help with this step, if you have on hanging around). Mix milk, banana, applesauce, yogurt, eggs and vanilla in one bowl.

Photobucket

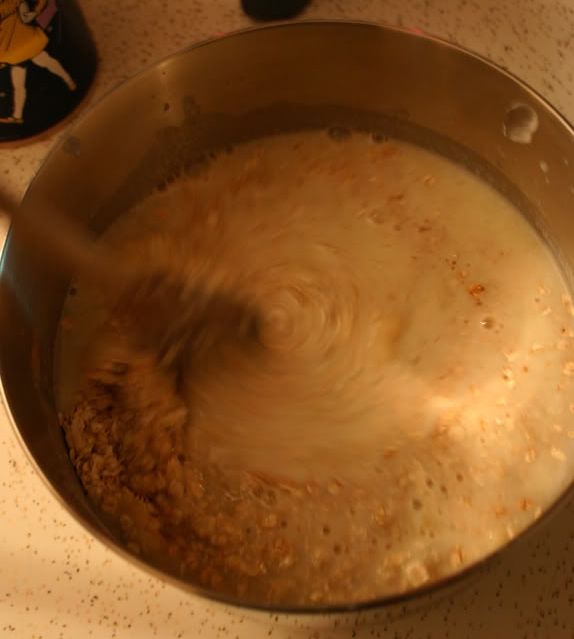
In a big bowl, combine oatmeal, salt, brown sugar, spices and baking powder. Add wet ingredients to try ingredients and stir.

Photobucket

Add a handful of raisins and another of Craisins. After one more quick stir, pour into pan sprayed with non-stick spray. I'm using a 9x13 pan to make a thinner oatmeal, for thicker slices use a 9x9 pan.

Photobucket

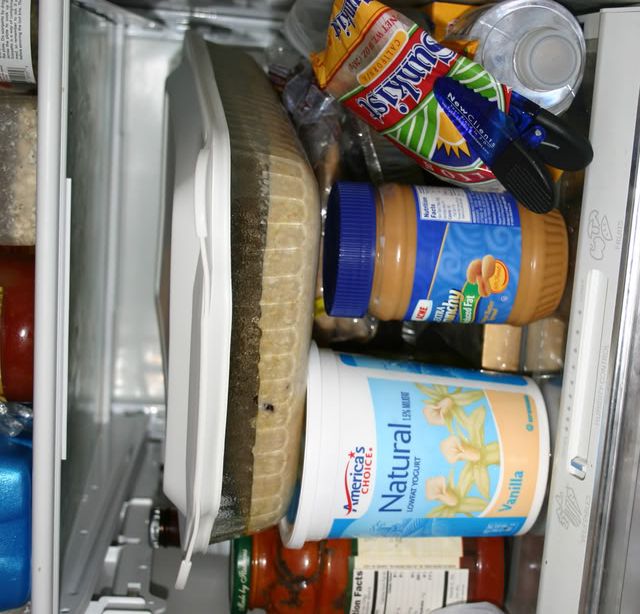
Now you can either put it in the oven at 350 for about 30 minutes or until the center is firm but not over-baked, or cover and store in the refrigerator and bake it in the morning. The flavors blend well when refrigerated overnight. I'm going to pop it in the oven before I shower and it'll be nice and hot to take into the office. No one in my office had ever heard of baked oatmeal before I brought it into the office a couple months ago. They rioted when I took home the half-empty pan at the end of the day because I was traveling for the rest of the week. It's THAT good. (Although my coworkers will eat pretty much anything. Except those chocolate candies contributed by my Ukrainian coworker that someone thought was made with bird's milk. It wasn't until I pointed out that birds don't produce milk that that rumor was put to rest, but the candy was eventually throw away because bird's milk, yum!)

Photobucket

When piping hot, dish up bowls and top with milk (some prefer the milk heated, I like it cold) or yogurt. It's great as leftovers, too. Wrap individual squares and eat as a breakfast bar as you run to catch the bus. (Oh, am I the only one that runs for the bus EVERY morning?)

Postscript: The banana flavor is very strong. I will add more cinnamon next time because I like my baked oatmeal like I like my men: SPICY!

Tuesday, July 22, 2008

Say it ain't so Strawberry Jam

Do you read my blog? Then you know that I'm pregnant...STILL. I've resorted to "things that I've always thought about maybe doing" list and on that list was making Strawberry Jam the way my Grandma Teresa used to do it. Now I knew this would be a project and I embraced that because I have NOTHING to do.

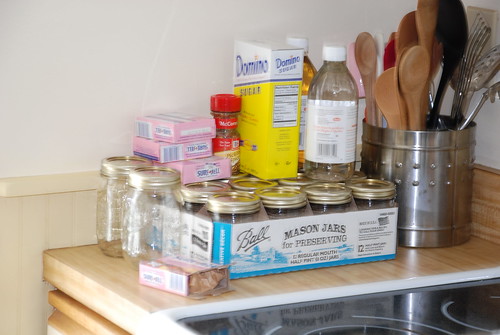
Step One: Find Ball preserve jars and lids
Stuff for Jam
Now this proved more difficult then I thought - 7 stores later and a Twitter from the very greatest of Matriarch's AndreAnna and I found them at the craft store. But they didn't have new lids and if there is anything I remember about from my Grandma was that you needed NEW lids. On a whim I looked in the hardware store this morning and did you know they have LIDS and the jars and everything. The hardware store that is literally a 10 minute walk from my house could have saved HOURS of hunting yesterday.

Step Two: Find fruit
Strawberries
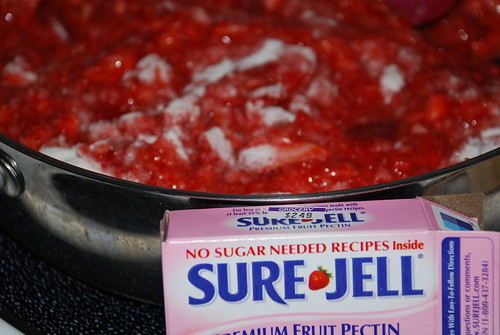
I went to BJ's Warehouse and they had perfect Strawberries so that was decided easily enough. I had found the Sure Jell that I needed earlier so I was ready to go.

Step Three: Find recipe
My Grandma loved to write down recipes and because of this I have BOOKS and BOOKS of her recipes so I started hunting this morning. I looked. And I looked. Nothing. So finally I called her up at the nursing home...I love my Grandma and we have a load of amazing memories together but she's not altogether present now and she's not big on talking on the phone so I didn't know how this was going to go. So she said Hi and asked how the baby was and I said still inside and she gasped and asked how long I planned on baking her. So she's fiesty today - that's good for me. So I ask her where her recipe is to make Strawberry Jam and she said on the box of the Sure Jell. Rock on Grandma.

Step Four: Prepare to make the jam
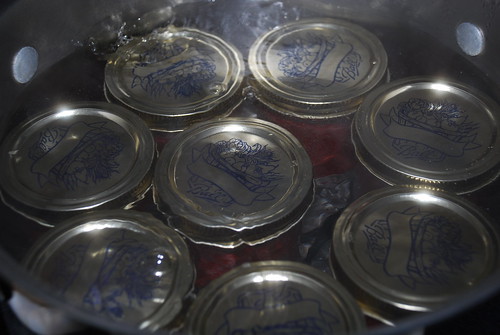
This is involved because I planned on "canning" the jam as I didn't want to have to refridgerate all this jam. So you have to wash with hot soapy water everything and then I ran it through the sanitze feature on our dishwasher and then you boil the lids.

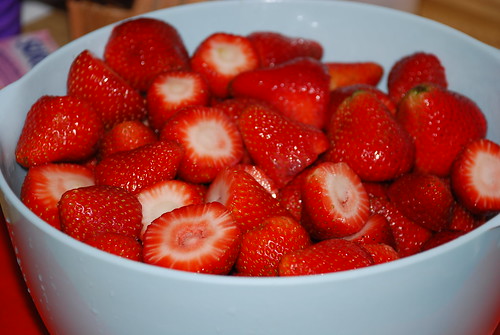
Step Five: Chop up your strawberries
Lazy chopping
I used the food processor because I'm lazy like that and I didn't have a potato masher.

Step Six: Cook with your Sure Jell and 1/4c. Sugar until it boils for a minutes
Sure Jell
Step Seven: Add the rest of the sugar (3 3/4c.) and bring to a boil again for exactly one minute. Remove from heat. Skim off foam.

Step Eight: Pour into your jars - put your boiled lids on top of the jam and then screw on the top.
Strawberry Jam

Step Nine: Now if you're going to give it all away or if you're going to keep it all in your fridge you can stop here but I wanted to go ALL the way there so I canned them.
Boil Those Babies Up
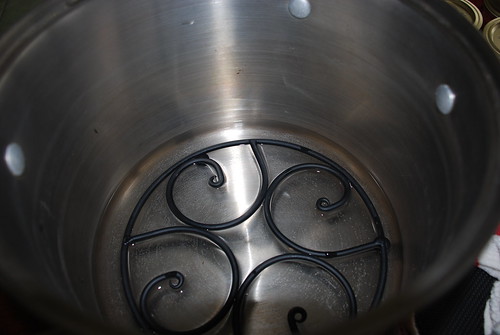
Which basically means you boil the sealed containers for about 10 minutes. If you don't have a "canner" (which I'll be honest I don't even know what a canner technically is) you can just stick a hot plate grate in the bottom of your pan - you just don't want to put your glass jars right on top of the bottom of the pan for reasons that I do not know but Grandma said so lets go with that.
Homemade Canner

Step Ten: Open up one of the still warm jars while standing in front of the sink and try really hard not to consume the entire jar with the spoon in your hand.
Completed Jams YUMMM

I would love to say that this was SO much cheaper then buying a jar of jam from the grocery store...but it wasn't. In the end each jar ended up costing about $3.00 including the price of the jar and lids so it WOULD be cheaper when (hahaaha with a newborn) I make the next batch of jam. What I will say is that it tasted WAY better then any jam I've ever had before. EVER. Seriously this stuff makes smuckers taste like crap in comparison. Now if you don't mind me I'll be going to make some toast with equal part Jam to Bread.
Jam

Friday, July 18, 2008

Best Bread Recipe Ever

This recipe comes courtesy of Morgan over at My Place of Beauty

Here's what you are going to need:
Three Mixing Bowls
One spoon You need a spoon to stir the dough.
Two measuring cups A 1/4 cup and a 1/2 cup will do the job.
One measuring spoon A one-teaspoon measurer will be just perfect.
One bread pan Obviously, to bake the bread in.
One hand towel This is just to cover the bread dough as it rises so it doesn't get drafts or dust or anything on it.
1/4 cup milk
5 teaspoons sugar
(or 1 1/2 tablespoons)
1 teaspoons salt
5 teaspoons butter (or 1 1/2 tablespoons)
1 package active dry yeast (you can get yeast near the flour at your local grocery store)
2 1/2 to 3 1/2 cups flour (get unbleached white for your first attempt)
Corn starch or nonstick cooking spray (just to prevent the bread from sticking to the bowl or pan)
Ok, to begin with, you'll need to get the bowl warm. The easiest way to do this? Put hot water in the bowl, let it sit for a minute, and then pour it out, and wipe out the bowl. You could also put water in the bowl and then heat it up in the microwave.
Mix 1 cup of hot water (put a cup of water in the microwave and heat it up for about 1 1/2 mins.) and the package of yeast in the bowl until all of the yeast is dissolved and you have a brown/tanish liquid that has a few bubbles in it. Let it sit for a minute, while you melt the butter in the microwave.
Add the butter, milk, sugar and salt to the yeast mixture and stir in until the liquid returns to about the same color as before (tanish) and everything is well mixed.
Here's where it gets sticky: Mix in 2 cups of flour to begin with. It's going to stick to the spoon at first, but mix hard and fast. When it's mixed in well, add 1/4 cups of flour to the mixture until the dough is sticky, but doesn't stay stuck to your fingers.
Take a bit of flour in your hands and put it on the surface you will be kneading the dough on. Turn on a timer for 10 minutes. Turn the dough out onto the surface and beat on it, twist it, turn it, and beat on it some more for 10 straight minutes. When the timer goes off, take the dough and put it in a bowl. (Do not clean the flour up, leave it for later.)
Take the other bowl you have out and fill it with water. Put it in the microwave for 2 minutes. Take it out and (quickly) put the bowl with the dough into the microwave and cover it with the dish towel.
Wait 1 hour.
After the hour is done, the dough should have doubled in size. If not, it's okay, if so- great. As long as it rose some, it will work out.
Turn the dough back out onto the floured surface and roll it out. Spread it out in a rectangle shape, with one side being roughly the length of the bread pan and the other side being about a bread pan and a half long.
Then roll the bread like you would a soft taco. Take the ends and tuck them under on the side where the seam is, and place the bread in the pan seam down.
Put the bowl with the water in the microwave for 2 minutes again and then put the bread back in, with the towel over it, so it can rise.
Wait one more hour. (You can clean up the flour at this time.)
Preheat the oven to 400 degrees.

Put the loaf in the oven at 400 degrees Fahrenheit (200 degrees Celsius) for thirty minutes. When it's done, pull it out and immediately remove it from the pan to cool.

Monday, July 14, 2008

Fruit Salsa and Cinnamon Chips

This post comes courtesy of Kelly over at Kelly Cooks and Other Amazing Feats.

---

This recipe was recently posted on the What's Cooking board that I frequent. Everyone was asked what their "best" item was -- and Robyn said hers was fruit salsa.

We all begged for the recipe, and this was what she told us!

This is AMAZING. Eating the fruit with the chips, it tastes like healthy apple pie! It's deeeeelicious!


Warning: This makes enough to feed an Army. I didn't stop to consider this when chopping the fruit, so now I've got enough fruit salsa for the Armed Forces. If you're making this for 2 people (like I did) you may want to halve everything. If you're making it for company -- make the whole thing. They'll eat every ounce!

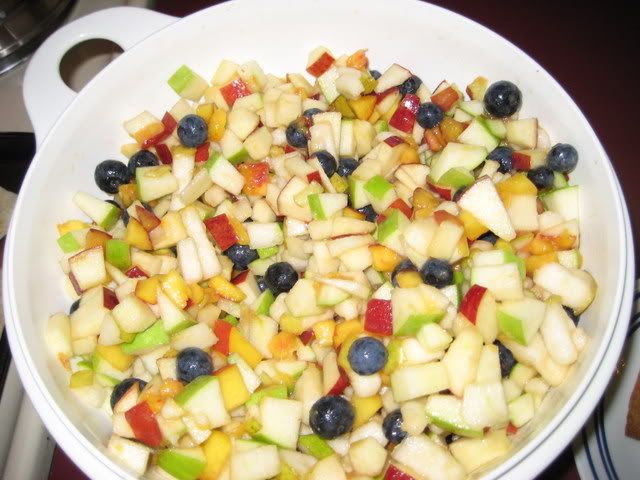
Sorry for the un-natural light pics...I couldn't wait!

Fruit Salsa
(Robyn, on What's Cooking)

2 red apples
2 green apples
2 pears
2 peaches
1 carton raspberries (I used blueberries because DH doesn't like raspberries)
3 tablespoons orange juice
2 teaspoons honey
2 lemons (or equivalent in juice)

Directions
- Dice all fruit very finely and put in a large mixing bowl
- Squeeze 1/2 a lemon's worth of juice after each addition (1/2 lemon after adding all red apple, 1/2 lemon after adding all green apple, etc)
- Whisk together the orange juice and the honey and pour it over the fruit. Carefully mix together

**It's best made the day before, and as long as you use plenty of lemon and orange juice, it won't brown**

Photobucket

Cinnamon-Sugar Tortilla Chips
10-15 10" flour tortillas (I had enourmous burrito tortillas...next time I'll use smaller ones for smaller chips!)
melted butter
cinnamon/sugar mixture

Directions
- Preheat the oven to 250 degrees F
- Brush melted butter on whole tortilla and sprinkle with cinnamon sugar mix
- Use a pizza cutter and cut into 8 sections
- Fill up a baking sheet with them
- Bake at 350 degrees for 10-11 minutes, or until crisped up

Photobucket

Thursday, July 10, 2008

Braciola

This recipe began life when I read about it in an article on (of all places) the ESPN website. I found a few recipes and concocted the following from them.

1 kg lean steak (flank or round works best)
Butcher’s string
cooking oil (I suggest olive, but canola works too)
2 eggs
1 cup italian seasoned bread crumbs
300g coarsely shredded mozzarella
½ cup grated parmesan
1 ½ cups raisins
4-5 green onions
2 tablespoons olive oil (this I recommend olive)
3-4 cloves garlic
1 tsp parsley
salt and pepper to taste

Filling:
Beat eggs and add parsley, rasped garlic, and olive oil. Mix.
Chop onions at desired coarseness (we prefer thinly sliced) and add. Mix.
Add bread crumbs, cheeses, and raisins. Mix.
Set aside for later.

Steak:
You can either purchase fast-fry (or “minute”) steak from your butcher, or you can purchase a larger cut and thinly fillet it yourself. You want the steak to be approximately ¼” or so thick after pounding. Lay each slice of meat out flat and spread with a thin layer of the filling. The rule of thumb I use is no more than the depth of one raisin. Roll the steak up and tie with butcher’s string.

At this point, braciolas may be frozen. We have found they stick together, so freezing them separated on a flat surface until hard would be recommended prior to placing them in a freezer bag or container.

Cooking:
We use our barbecue because this recipe was first tried on a very hot summer day, but an oven will work as well.

Place braciolas in a pan with cooking oil and fry until brown on all sides. Remove from frying pan and place in a disposable aluminum foil baking pan. Pour drippings over top, and add more cooking oil if necessary to coat the bottom of the pan. Place in a barbecue over medium heat (our temperature gauge reads in the 350°F range) for approximately 30-45 minutes, until well done. Remove from barbecue, cut string, cut into half inch thick "spirals" and serve.

Wednesday, July 9, 2008

Dinner on a Hot Night...

This post has been brought to you by Multi-Tasking Mommy.

I don't know about you, but I cannot stand cooking dinner in this humidity! I don't want to run the oven because it will heat the house. I don't want to cook on the stove top because it will heat me and I certainly don't want to bbq because it will let heat in the house and I just cannot stand being outside in the humidity right now (I'm 27 weeks preggers).
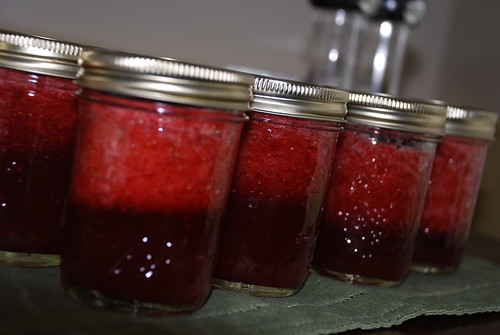
Ok, enough whining about the heat....

The lesser of evils for me would be cooking on the stove top. I enjoy cooking pancakes with fresh berries and what better time of year to do so than right now.

Here is my pancake recipe that I love to make. You can even make it healthier by switching half of the flour for whole wheat flour.

Yummy Pancakes
2 cups flour
2 tsp baking powder
1/2 tsp salt
1 1/2 Tbsp sugar
2 cups milk
2 eggs
fresh or frozen berries (I love blueberries in mine)

Mix dry ingredients and wet ingredients in separate bowls. Add them together and mix until almost smooth.

You know how to cook pancakes, don't you? The trick is to wait until you see bubbles forming on the top and that is when you know it's time to add your berries and flip!
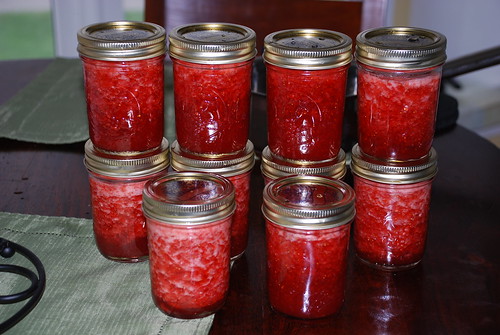
I like to serve pancakes with yogurt and fresh fruit on the side.

Mmmmm....breakfast for dinner! One of my favs.

Tuesday, July 8, 2008

Hey Good Lookin, Whatcha Got Cookin?

I'm sure there are people out there that have more then a golf ball sized space left for their stomach....I don't happen to be one of them. I have NO space for food and let me tell you it is NO fun. It's no fun to make an entire plateful of s'mores in your toaster oven only to discover you can eat TWO before feeling STUFFED. You eat a third because you think "I'll make the room" but you don't and you end up with a stomach ache.

So the question I have for the group tonight is IF you had a golf ball sized stomach to fill what would you fill it with? We're talking ANYTHING here people - what you got?

Monday, July 7, 2008

Calling all helpers!

Cass and I are both teetering very close to giving birth; hence, why the site has slowed down its posting recently.

We're asking for guest bloggers out there to help us out a bit to keep things flowing. Have a fun summer recipe you want to share? Feel strongly about a particular food or health topic (for instance, I'm trying to cut out artificial sweeteners - easier said than done!)? Have any vegetarian recipes for the Summer O' Meat? Just love to talk about food? Have a food rant? Favorite restaurant?

Let us know! Email Us Here!

Irresistible Strawberry Muffins

This recipe has been brought to you by Multi-Tasking Mommy!

This time of year, many of us find ourselves overwhelmed by strawberries taking over our refrigerator after strawberry picking. This year, my 3 year old daughter and I went picking. We picked a huge bucket of berries (well, admittedly, she did most of the work as I am pregnant and wasn't loving bending over too much).


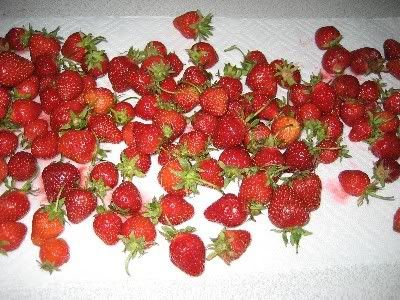
We got home and she helped me wash the strawberries and then we placed them on tea towels all over the kitchen to let them dry, WELL!

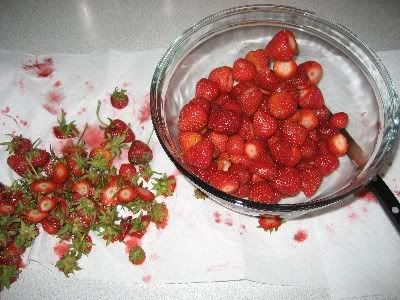
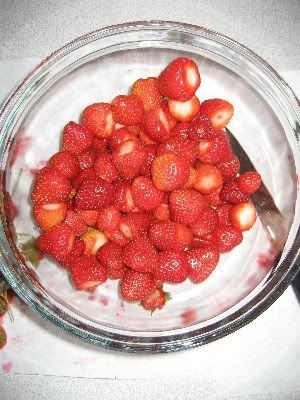
Once dried, we placed some berries on paper towels in layers in a rubbermaid container, we pureed some berries and we fast froze the rest on a cookie sheet, later to be transferred to a ziplock bag to be used for future smoothies or baking.


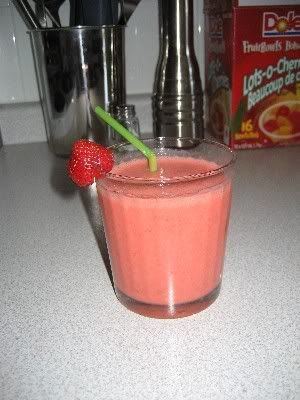
Oh, and we may have enjoyed a really yummy Strawberry Mocktail along the way :)


Anyhow, here is an amazing "dessert" muffin recipe to help you use up your strawberries. It is a yummy one--beware, the muffins won't make it into a container!

Irresistible Strawberry Muffins
2 cups All Purpose Flour
3 1/2 tsp. Baking Powder
1/2 tsp. Salt
1/2 cup Granulated Sugar
1 Egg Lightly Beaten
1 cup Milk
1/3 cup Melted Butter
1 tsp. Vanilla Extract
1 cup Chopped Strawberries

Preheat over to 375

In a large bowl, mix together, flour, baking powder, salt & sugar & chopped strawberries. Stir well.

In a separate bowl, combine the egg, milk, vanilla extract and melted butter. Mix well.

Add liquid mixture to the dry ingredients, stirring just until moist. If you over mix this batter, your muffins will turn out to be tough.

Sprinkle muffins with a sugar/cinnamon mixture.
Bake at 375 degrees for 20 to 22 minutes or until toothpick comes out clean.

Wednesday, June 25, 2008

All this time it was just a little flour?

Each week I try to introduce variety into our meals. 2 nights a week we have chicken, 1 night we have red meat, 1 night we go vegetarian with it and then 2 (sometimes 3) nights we'll have something in the seafood family and then we go out one night.

Whenever we go out the FH will usually get a piece of fish and usually it's pan seared and it's got this nice golden crusty outside. Now I'm good with seafood - I know my way around marinades and grilling but this pan sear I could not do. How did they get it to brown like that? How? So I cornered a chef friend of mine a couple of weeks ago and I said "Jordan, you must tell me HOW does this brown crusty pan seared goodness GET on the seafood". And because he's nice and not temperamental like some chef's I know he actually shared the secret.

It's flour.

No joke. Just a little flour. First you get your pan good and hot, THEN add a touch of oil - roll it around the pan so it coats the pan perfectly. Then take a little flour and season it with whatever you like and then coat your seafood with it and then add to your hot oiled pan. That's it. Crusty goodness - perfection browned. I've used this technique on scallops (seasoned with paprika, salt and pepper) and the FH was Wow'd then I did it with salmon and once the salmon was to it's perfectly medium-rare ish doneness I added some teryaki sauce and it carmalized onto the brown goodness so perfectly that I actually can't wait to eat it again tonight.

Am I the only one that didn't know how to do this? Was this featured the day that I missed Home Economics? Do they still teach home economics?

Monday, June 23, 2008

How I ate an entire Blueberry Coffee Cake

I have a very true love for the Blueberry. It's true and deep and fulfilling...everything love should be. So when I came across a recipe in Cooking Light for Blueberry Coffee Cake I thought that I may have just died a little because surly this is heaven.

Things about this recipe that I struggled with, changed or loved:

  • Buttermilk. Okay, I went and bought it but they come in ONE size - what else does one make with Buttermilk. Please send ideas.
  • I used my Whole Wheat Pastry Flour instead of All Purpose and I have to say it was a perfect swap and didn't change the texture or taste at all for the worse. I totally recommend this substitution to up the fiber.
  • Turbinado Sugar - I'm sorry but I have no idea what this is - I used brown sugar...it did the job.
  • It says a 9 inch round baking pan. I guess this is different then a cake pan - because it wouldn't have fit in a cake pan so I ended up using my large round pyrex and then a small round pyrex.
  • I ate the small round pyrex in one sitting..it was just that good. And you know I'll admit to you that I used some butter on it. Not light butter either, none of this I can't believe butter - I went full on Paula Dean butter on this thing and it was worth it. The following picture is the only proof that the small coffee cake every existed.


  • I'm freezing the large one for breakfast for after our baby arrives and we'll have people over and I can look like I have my shit together (hahaha, the illusion is so pretty).
  • With my substituions on the flour it takes the Calories to 260 the Fat stays at 9.9 and the Fiber goes up to 4.5g. This makes this a 5 point breakfast

Monday, June 16, 2008

A Man's Meatloaf

Being on maternity leave affords me a few useless hours each day. I am not a "fluff" TV watcher, so if I'm not reading, I find myself flipping between TLC, the Food Network, and Discovery.

Last week, I saw Guy Fieri make a meatloaf that looked artery-clogging enough to be perfect for a Father's Day dinner - Cornbread Stuffed Meatloaf.

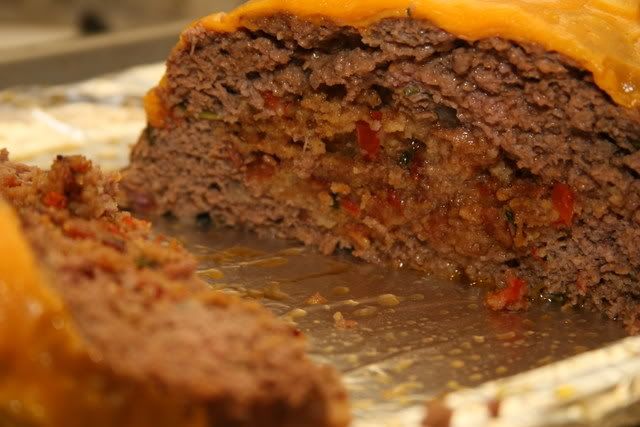
I won't lie to you - this meal took a lot of prep, especially if you use all fresh ingredients and don't buy the pre-chopped stuff. But, the end product was so worth it. It was moist and delicious, and the textures of the cornbread stuffing in the meat was fantastic. I didn't alter the recipe at all, but in retrospect, I would have used a little less thyme, and maybe a little bit of plain breadcrumbs in the meat mixture to hold it together better. Though incredibly tasty, the slices kind of fell apart once you cut into them.

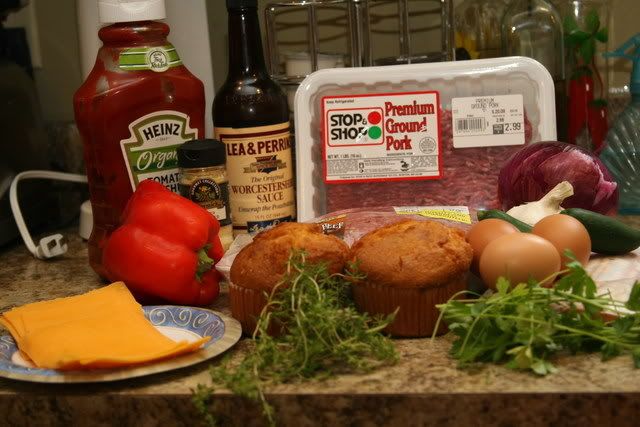
What you need:

Photobucket

Stuffing:
2 large or 5 small corn muffins (2 to 3 cups), crumbled by hand
1/2 pound bacon, chopped
1 red bell pepper, diced
1 tablespoon seeded and minced jalapeno
2 tablespoons minced garlic
2 tablespoons chopped fresh flat-leaf parsley
Salt and pepper
1 egg, beaten

Meatloaf:
3 tablespoons olive oil, plus 3 tablespoons
1 cup diced red onion
1 tablespoon seeded and minced jalapeno
2 tablespoons minced garlic
2 pounds ground beef
1 pound ground pork
2 teaspoons sea salt
2 teaspoons freshly cracked black pepper
2 tablespoons chopped parsley leaves
1 tablespoon chopped thyme leaves
1 teaspoon dry mustard
1/4 cup ketchup
1 tablespoon Worcestershire sauce
2 eggs
6 ounces sliced Cheddar

What you do:

Stuffing:
Preheat oven to 275 to 300 degrees F.

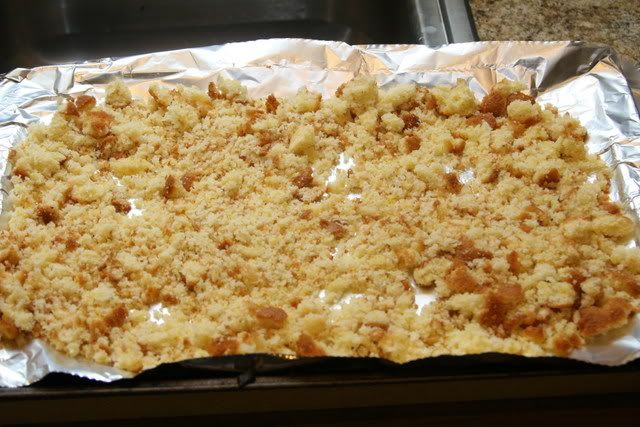
Spread the cornbread crumbs on a sheet pan and let toast for about 20 minutes, or until lightly toasted and dry. Turn oven up to 350 degrees F.

Photobucket

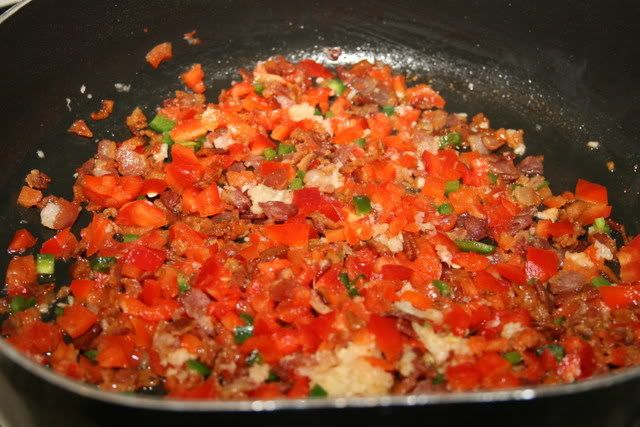
In a skillet brown the bacon until crispy. Drain. To the same skillet add the red pepper, jalapeno, and garlic and cook until soft.

Photobucket

In a bowl, combine the cornbread crumbs, bacon, and vegetable mixture. Add parsley and salt and pepper, to taste. Add the egg and mix thoroughly.


Meatloaf:
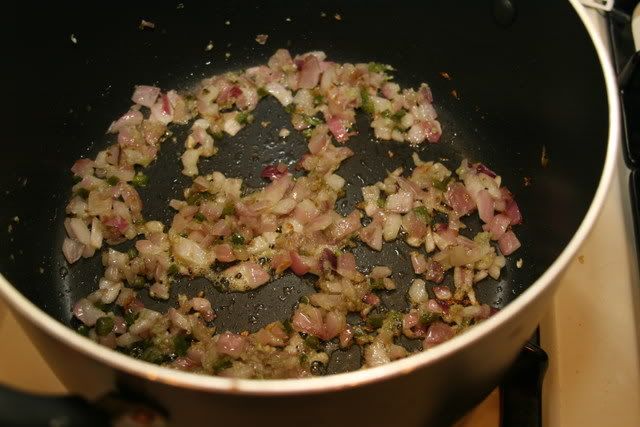
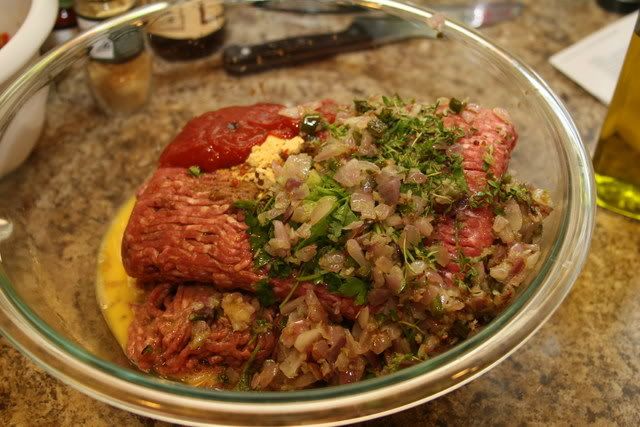
In medium skillet over medium heat add oil, red onions, jalapeno and garlic. Cook until caramelized, remove from heat and let cool.

Photobucket

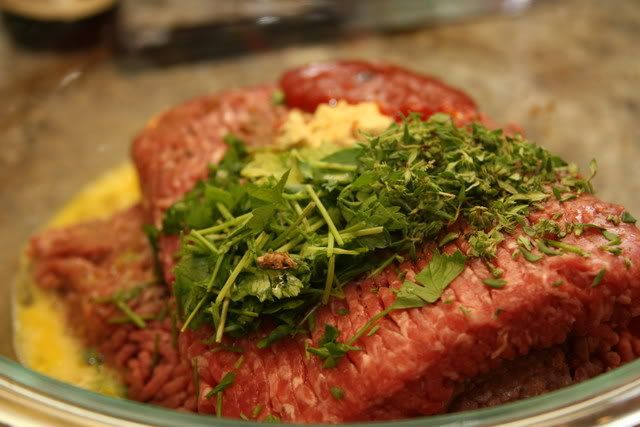
In a bowl combine the meat, salt, pepper, parsley, thyme, mustard, ketchup Worcestershire, and eggs, cooled onion mixture, and thoroughly mix.

Photobucket

Photobucket

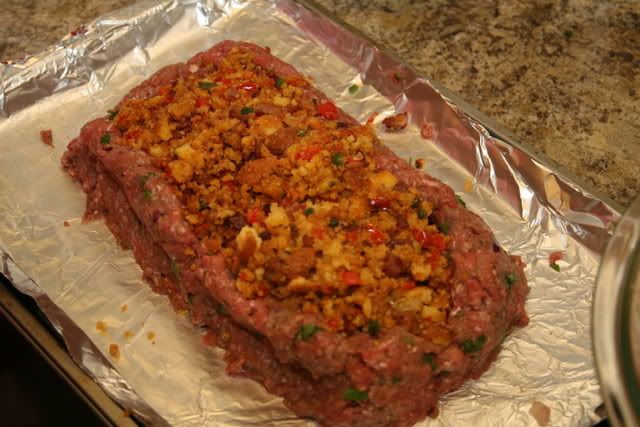
Divide the meat mixture in half. Shape 1 half into a rectangle, creating a canoe, and then loosely fill with stuffing. Do not pack it in.

Photobucket

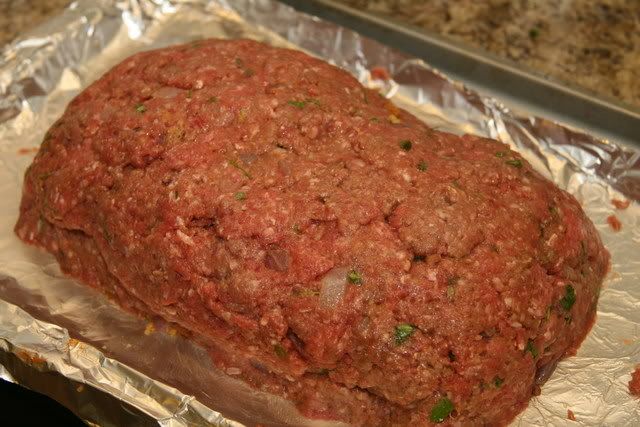
Use the other half of the meat to fully enclose the stuffing.

Photobucket

Transfer to the oven and bake for 1 1/2 hours, or until internal temperature reaches 145 degrees F. Layer the cheese slices on top and bake for another 5 minutes to melt the cheese. Remove from oven and let rest for about 10 minutes. Cut into thick slices and serve.

Photobucket