Monday, July 28, 2008

Baked oatmeal

Strong Enough for An Amishman but Made for a Woman


This recipe comes courtesy of Pomjob

-----

I grew up like five minutes from the famed Amish County, U.S.A., where baked oatmeal is a cornerstone of the breakfast table (at least according to all the area bed & breakfast establishments). I don't remember my first encounter with the delectable dish but I remember rediscovering it a couple years ago when I went to a new breakfast hotspot in my hometown. In an area where men (i.e., my brother-in-law) really do wear shirts reading "Vegetarian is Just Another Name for Bad Hunter," there are few options if you're not of the meat and egg-loving persuasion. Out of desperation, I decided to try the baked oatmeal and it was heaven on a spoon.

My recipe for baked oatmeal has been different every time because I always modify a recipe I find online, but I never write it down. Thank you, Chop.Stir.Mix, for the opportunity to write down my latest variation for posterity.

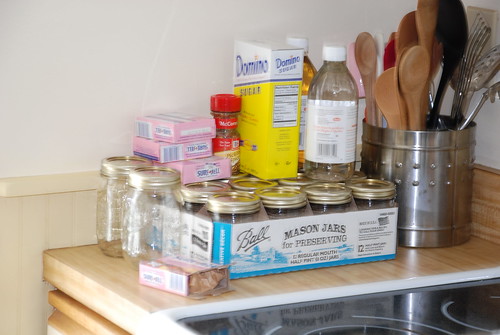
First, gather your ingredients. I like short, sweet recipes so don't let this list intimidate you. You can mix and match; this is my first time trying it with banana, usually I chop up an apple but I was fresh out. I tried to make this healthy so I substituted applesauce and yogurt for oil. Craisins are my newest foodsession so I tossed in a handful; you can try walnuts or pecans, too. It's so versatile.

Photobucket

3 c oatmeal (regular or quick oats)

Dash salt (optional)

1 t cinnamon (I'll use more next time)

½ t nutmeg

2 t baking powder

¼ c brown sugar

½ c applesauce

½ c lowfat vanilla yogurt

2 eggs (or the equivalent)

1 ½ c lowfat milk

Dash of vanilla

1 mashed banana

½ c raisins

½ c Craisins

Photobucket

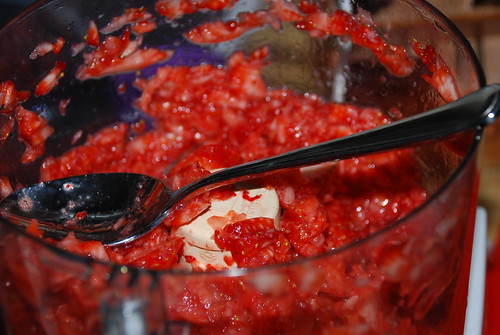
Get that banana good and smashed (enlist a kid to help with this step, if you have on hanging around). Mix milk, banana, applesauce, yogurt, eggs and vanilla in one bowl.

Photobucket

In a big bowl, combine oatmeal, salt, brown sugar, spices and baking powder. Add wet ingredients to try ingredients and stir.

Photobucket

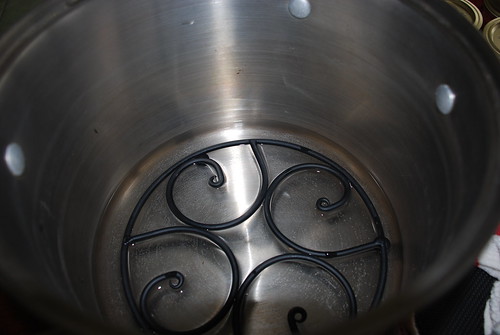
Add a handful of raisins and another of Craisins. After one more quick stir, pour into pan sprayed with non-stick spray. I'm using a 9x13 pan to make a thinner oatmeal, for thicker slices use a 9x9 pan.

Photobucket

Now you can either put it in the oven at 350 for about 30 minutes or until the center is firm but not over-baked, or cover and store in the refrigerator and bake it in the morning. The flavors blend well when refrigerated overnight. I'm going to pop it in the oven before I shower and it'll be nice and hot to take into the office. No one in my office had ever heard of baked oatmeal before I brought it into the office a couple months ago. They rioted when I took home the half-empty pan at the end of the day because I was traveling for the rest of the week. It's THAT good. (Although my coworkers will eat pretty much anything. Except those chocolate candies contributed by my Ukrainian coworker that someone thought was made with bird's milk. It wasn't until I pointed out that birds don't produce milk that that rumor was put to rest, but the candy was eventually throw away because bird's milk, yum!)

Photobucket

When piping hot, dish up bowls and top with milk (some prefer the milk heated, I like it cold) or yogurt. It's great as leftovers, too. Wrap individual squares and eat as a breakfast bar as you run to catch the bus. (Oh, am I the only one that runs for the bus EVERY morning?)

Postscript: The banana flavor is very strong. I will add more cinnamon next time because I like my baked oatmeal like I like my men: SPICY!

Tuesday, July 22, 2008

Say it ain't so Strawberry Jam

Do you read my blog? Then you know that I'm pregnant...STILL. I've resorted to "things that I've always thought about maybe doing" list and on that list was making Strawberry Jam the way my Grandma Teresa used to do it. Now I knew this would be a project and I embraced that because I have NOTHING to do.

Step One: Find Ball preserve jars and lids
Stuff for Jam
Now this proved more difficult then I thought - 7 stores later and a Twitter from the very greatest of Matriarch's AndreAnna and I found them at the craft store. But they didn't have new lids and if there is anything I remember about from my Grandma was that you needed NEW lids. On a whim I looked in the hardware store this morning and did you know they have LIDS and the jars and everything. The hardware store that is literally a 10 minute walk from my house could have saved HOURS of hunting yesterday.

Step Two: Find fruit
Strawberries
I went to BJ's Warehouse and they had perfect Strawberries so that was decided easily enough. I had found the Sure Jell that I needed earlier so I was ready to go.

Step Three: Find recipe
My Grandma loved to write down recipes and because of this I have BOOKS and BOOKS of her recipes so I started hunting this morning. I looked. And I looked. Nothing. So finally I called her up at the nursing home...I love my Grandma and we have a load of amazing memories together but she's not altogether present now and she's not big on talking on the phone so I didn't know how this was going to go. So she said Hi and asked how the baby was and I said still inside and she gasped and asked how long I planned on baking her. So she's fiesty today - that's good for me. So I ask her where her recipe is to make Strawberry Jam and she said on the box of the Sure Jell. Rock on Grandma.

Step Four: Prepare to make the jam
This is involved because I planned on "canning" the jam as I didn't want to have to refridgerate all this jam. So you have to wash with hot soapy water everything and then I ran it through the sanitze feature on our dishwasher and then you boil the lids.

Step Five: Chop up your strawberries
Lazy chopping
I used the food processor because I'm lazy like that and I didn't have a potato masher.

Step Six: Cook with your Sure Jell and 1/4c. Sugar until it boils for a minutes
Sure Jell
Step Seven: Add the rest of the sugar (3 3/4c.) and bring to a boil again for exactly one minute. Remove from heat. Skim off foam.

Step Eight: Pour into your jars - put your boiled lids on top of the jam and then screw on the top.
Strawberry Jam

Step Nine: Now if you're going to give it all away or if you're going to keep it all in your fridge you can stop here but I wanted to go ALL the way there so I canned them.
Boil Those Babies Up
Which basically means you boil the sealed containers for about 10 minutes. If you don't have a "canner" (which I'll be honest I don't even know what a canner technically is) you can just stick a hot plate grate in the bottom of your pan - you just don't want to put your glass jars right on top of the bottom of the pan for reasons that I do not know but Grandma said so lets go with that.
Homemade Canner

Step Ten: Open up one of the still warm jars while standing in front of the sink and try really hard not to consume the entire jar with the spoon in your hand.
Completed Jams YUMMM

I would love to say that this was SO much cheaper then buying a jar of jam from the grocery store...but it wasn't. In the end each jar ended up costing about $3.00 including the price of the jar and lids so it WOULD be cheaper when (hahaaha with a newborn) I make the next batch of jam. What I will say is that it tasted WAY better then any jam I've ever had before. EVER. Seriously this stuff makes smuckers taste like crap in comparison. Now if you don't mind me I'll be going to make some toast with equal part Jam to Bread.
Jam

Friday, July 18, 2008

Best Bread Recipe Ever

This recipe comes courtesy of Morgan over at My Place of Beauty

Here's what you are going to need:
Three Mixing Bowls
One spoon You need a spoon to stir the dough.
Two measuring cups A 1/4 cup and a 1/2 cup will do the job.
One measuring spoon A one-teaspoon measurer will be just perfect.
One bread pan Obviously, to bake the bread in.
One hand towel This is just to cover the bread dough as it rises so it doesn't get drafts or dust or anything on it.
1/4 cup milk
5 teaspoons sugar
(or 1 1/2 tablespoons)
1 teaspoons salt
5 teaspoons butter (or 1 1/2 tablespoons)
1 package active dry yeast (you can get yeast near the flour at your local grocery store)
2 1/2 to 3 1/2 cups flour (get unbleached white for your first attempt)
Corn starch or nonstick cooking spray (just to prevent the bread from sticking to the bowl or pan)
Ok, to begin with, you'll need to get the bowl warm. The easiest way to do this? Put hot water in the bowl, let it sit for a minute, and then pour it out, and wipe out the bowl. You could also put water in the bowl and then heat it up in the microwave.
Mix 1 cup of hot water (put a cup of water in the microwave and heat it up for about 1 1/2 mins.) and the package of yeast in the bowl until all of the yeast is dissolved and you have a brown/tanish liquid that has a few bubbles in it. Let it sit for a minute, while you melt the butter in the microwave.
Add the butter, milk, sugar and salt to the yeast mixture and stir in until the liquid returns to about the same color as before (tanish) and everything is well mixed.
Here's where it gets sticky: Mix in 2 cups of flour to begin with. It's going to stick to the spoon at first, but mix hard and fast. When it's mixed in well, add 1/4 cups of flour to the mixture until the dough is sticky, but doesn't stay stuck to your fingers.
Take a bit of flour in your hands and put it on the surface you will be kneading the dough on. Turn on a timer for 10 minutes. Turn the dough out onto the surface and beat on it, twist it, turn it, and beat on it some more for 10 straight minutes. When the timer goes off, take the dough and put it in a bowl. (Do not clean the flour up, leave it for later.)
Take the other bowl you have out and fill it with water. Put it in the microwave for 2 minutes. Take it out and (quickly) put the bowl with the dough into the microwave and cover it with the dish towel.
Wait 1 hour.
After the hour is done, the dough should have doubled in size. If not, it's okay, if so- great. As long as it rose some, it will work out.
Turn the dough back out onto the floured surface and roll it out. Spread it out in a rectangle shape, with one side being roughly the length of the bread pan and the other side being about a bread pan and a half long.
Then roll the bread like you would a soft taco. Take the ends and tuck them under on the side where the seam is, and place the bread in the pan seam down.
Put the bowl with the water in the microwave for 2 minutes again and then put the bread back in, with the towel over it, so it can rise.
Wait one more hour. (You can clean up the flour at this time.)
Preheat the oven to 400 degrees.

Put the loaf in the oven at 400 degrees Fahrenheit (200 degrees Celsius) for thirty minutes. When it's done, pull it out and immediately remove it from the pan to cool.

Monday, July 14, 2008

Fruit Salsa and Cinnamon Chips

This post comes courtesy of Kelly over at Kelly Cooks and Other Amazing Feats.

---

This recipe was recently posted on the What's Cooking board that I frequent. Everyone was asked what their "best" item was -- and Robyn said hers was fruit salsa.

We all begged for the recipe, and this was what she told us!

This is AMAZING. Eating the fruit with the chips, it tastes like healthy apple pie! It's deeeeelicious!


Warning: This makes enough to feed an Army. I didn't stop to consider this when chopping the fruit, so now I've got enough fruit salsa for the Armed Forces. If you're making this for 2 people (like I did) you may want to halve everything. If you're making it for company -- make the whole thing. They'll eat every ounce!

Sorry for the un-natural light pics...I couldn't wait!

Fruit Salsa
(Robyn, on What's Cooking)

2 red apples
2 green apples
2 pears
2 peaches
1 carton raspberries (I used blueberries because DH doesn't like raspberries)
3 tablespoons orange juice
2 teaspoons honey
2 lemons (or equivalent in juice)

Directions
- Dice all fruit very finely and put in a large mixing bowl
- Squeeze 1/2 a lemon's worth of juice after each addition (1/2 lemon after adding all red apple, 1/2 lemon after adding all green apple, etc)
- Whisk together the orange juice and the honey and pour it over the fruit. Carefully mix together

**It's best made the day before, and as long as you use plenty of lemon and orange juice, it won't brown**

Photobucket

Cinnamon-Sugar Tortilla Chips
10-15 10" flour tortillas (I had enourmous burrito tortillas...next time I'll use smaller ones for smaller chips!)
melted butter
cinnamon/sugar mixture

Directions
- Preheat the oven to 250 degrees F
- Brush melted butter on whole tortilla and sprinkle with cinnamon sugar mix
- Use a pizza cutter and cut into 8 sections
- Fill up a baking sheet with them
- Bake at 350 degrees for 10-11 minutes, or until crisped up

Photobucket

Thursday, July 10, 2008

Braciola

This recipe began life when I read about it in an article on (of all places) the ESPN website. I found a few recipes and concocted the following from them.

1 kg lean steak (flank or round works best)
Butcher’s string
cooking oil (I suggest olive, but canola works too)
2 eggs
1 cup italian seasoned bread crumbs
300g coarsely shredded mozzarella
½ cup grated parmesan
1 ½ cups raisins
4-5 green onions
2 tablespoons olive oil (this I recommend olive)
3-4 cloves garlic
1 tsp parsley
salt and pepper to taste

Filling:
Beat eggs and add parsley, rasped garlic, and olive oil. Mix.
Chop onions at desired coarseness (we prefer thinly sliced) and add. Mix.
Add bread crumbs, cheeses, and raisins. Mix.
Set aside for later.

Steak:
You can either purchase fast-fry (or “minute”) steak from your butcher, or you can purchase a larger cut and thinly fillet it yourself. You want the steak to be approximately ¼” or so thick after pounding. Lay each slice of meat out flat and spread with a thin layer of the filling. The rule of thumb I use is no more than the depth of one raisin. Roll the steak up and tie with butcher’s string.

At this point, braciolas may be frozen. We have found they stick together, so freezing them separated on a flat surface until hard would be recommended prior to placing them in a freezer bag or container.

Cooking:
We use our barbecue because this recipe was first tried on a very hot summer day, but an oven will work as well.

Place braciolas in a pan with cooking oil and fry until brown on all sides. Remove from frying pan and place in a disposable aluminum foil baking pan. Pour drippings over top, and add more cooking oil if necessary to coat the bottom of the pan. Place in a barbecue over medium heat (our temperature gauge reads in the 350°F range) for approximately 30-45 minutes, until well done. Remove from barbecue, cut string, cut into half inch thick "spirals" and serve.

Wednesday, July 9, 2008

Dinner on a Hot Night...

This post has been brought to you by Multi-Tasking Mommy.

I don't know about you, but I cannot stand cooking dinner in this humidity! I don't want to run the oven because it will heat the house. I don't want to cook on the stove top because it will heat me and I certainly don't want to bbq because it will let heat in the house and I just cannot stand being outside in the humidity right now (I'm 27 weeks preggers).

Ok, enough whining about the heat....

The lesser of evils for me would be cooking on the stove top. I enjoy cooking pancakes with fresh berries and what better time of year to do so than right now.

Here is my pancake recipe that I love to make. You can even make it healthier by switching half of the flour for whole wheat flour.

Yummy Pancakes
2 cups flour
2 tsp baking powder
1/2 tsp salt
1 1/2 Tbsp sugar
2 cups milk
2 eggs
fresh or frozen berries (I love blueberries in mine)

Mix dry ingredients and wet ingredients in separate bowls. Add them together and mix until almost smooth.

You know how to cook pancakes, don't you? The trick is to wait until you see bubbles forming on the top and that is when you know it's time to add your berries and flip!

I like to serve pancakes with yogurt and fresh fruit on the side.

Mmmmm....breakfast for dinner! One of my favs.

Tuesday, July 8, 2008

Hey Good Lookin, Whatcha Got Cookin?

I'm sure there are people out there that have more then a golf ball sized space left for their stomach....I don't happen to be one of them. I have NO space for food and let me tell you it is NO fun. It's no fun to make an entire plateful of s'mores in your toaster oven only to discover you can eat TWO before feeling STUFFED. You eat a third because you think "I'll make the room" but you don't and you end up with a stomach ache.

So the question I have for the group tonight is IF you had a golf ball sized stomach to fill what would you fill it with? We're talking ANYTHING here people - what you got?

Monday, July 7, 2008

Calling all helpers!

Cass and I are both teetering very close to giving birth; hence, why the site has slowed down its posting recently.

We're asking for guest bloggers out there to help us out a bit to keep things flowing. Have a fun summer recipe you want to share? Feel strongly about a particular food or health topic (for instance, I'm trying to cut out artificial sweeteners - easier said than done!)? Have any vegetarian recipes for the Summer O' Meat? Just love to talk about food? Have a food rant? Favorite restaurant?

Let us know! Email Us Here!

Irresistible Strawberry Muffins

This recipe has been brought to you by Multi-Tasking Mommy!

This time of year, many of us find ourselves overwhelmed by strawberries taking over our refrigerator after strawberry picking. This year, my 3 year old daughter and I went picking. We picked a huge bucket of berries (well, admittedly, she did most of the work as I am pregnant and wasn't loving bending over too much).


We got home and she helped me wash the strawberries and then we placed them on tea towels all over the kitchen to let them dry, WELL!

Once dried, we placed some berries on paper towels in layers in a rubbermaid container, we pureed some berries and we fast froze the rest on a cookie sheet, later to be transferred to a ziplock bag to be used for future smoothies or baking.


Oh, and we may have enjoyed a really yummy Strawberry Mocktail along the way :)


Anyhow, here is an amazing "dessert" muffin recipe to help you use up your strawberries. It is a yummy one--beware, the muffins won't make it into a container!

Irresistible Strawberry Muffins
2 cups All Purpose Flour
3 1/2 tsp. Baking Powder
1/2 tsp. Salt
1/2 cup Granulated Sugar
1 Egg Lightly Beaten
1 cup Milk
1/3 cup Melted Butter
1 tsp. Vanilla Extract
1 cup Chopped Strawberries

Preheat over to 375

In a large bowl, mix together, flour, baking powder, salt & sugar & chopped strawberries. Stir well.

In a separate bowl, combine the egg, milk, vanilla extract and melted butter. Mix well.

Add liquid mixture to the dry ingredients, stirring just until moist. If you over mix this batter, your muffins will turn out to be tough.

Sprinkle muffins with a sugar/cinnamon mixture.
Bake at 375 degrees for 20 to 22 minutes or until toothpick comes out clean.