Have I mentioned what a lucky girl I am to work with some really great people lately? Well I am. And I'm particularly lucky to work with Megan - she's fun, sarcastic in just the right way, and a very trusted confident to share conference call rantings with via IM. Megan, like me, was a good Catholic school girl and because of this she was preparing this feast for St. Joseph...which I believe (maybe, I'm really testing my Sunday school education here) is March 19th...maybe..shudder, Sister Susan, Sister Kevin and Sister Kieth forgive me and Father Paul, Monsignor Shannon you forgive me too. So she was making this Vegetable Lasagna and telling me all about it and I had to make it and can I just say how delicious it was - I had every intention of freezing half of it but it never actually made it to the freezer, there were very short term stops in the fridge. Make this, make some really yummy garlic bread and have a glass of red wine for me! Oh, one last thing. I have tried EVERY brand of whole wheat lasagna noodle out there and I can say that the Healthy Harvest brand is by far the best.
As the trips to the farmers market start to yield the very best of these vegetables I thought it was the perfect time to share this DELICIOUS recipe with all of you. Enjoy!
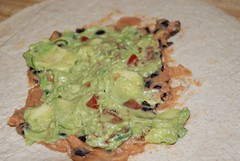
Megan's Vegetable Lasagna
Okay, this is all from memory, so amounts are a guess-timate-you can’t really mess it up. It’s actually a really healthy recipe…1/8 portion is about 5 or 6 points-not that you should be watching that stuff…I’m just saying…I’m such a geek.
What you need:
- One chopped onion
- About 15 mushrooms, chopped
- 3 or 4 gloves of garlic, crushed (I’m heavy on the garlic-sometimes up to 5 cloves)
- 14 oz. chopped tomatoes, drained
- 1/8 cup of fresh parsley, chopped
- 1/8 cup of fresh basil, chopped
- 8oz. tomato paste
- 8oz. tomato sauce
- 2 tablespoons of red wine
- 1 tablespoon brown sugar
- ½ teaspoon dried oregano
- ¼ teaspoon ground pepper
- 16 oz cottage cheese or ricotta
- 1 scrambled egg
- 1 package frozen chopped spinach, drained of excess water. You have to take the spinach and put it in a large bunch of paper towel to ring out the excess water.
- 1 zucchini, shredded
- 6 to 8 lasagna noodles
- 2 cups shredded mozzarella
- Dashes of parmesan cheese
What you do:
In a saucepan, add drizzles of olive oil. Add onion and sauté for a minute or two. Add mushroom, sauté for a minute. Add garlic, sauté again for a minute. Add drained chopped tomatoes. Stir it up. Add the fresh herbs. Add the paste and sauce. Add the wine, Brown sugar, Oregano and pepper. I usually simmer this for about 30 to 45 minutes. In a separate mixing bowl, mix the cottage cheese (or ricotta) scrambled egg, and drained chopped spinach. Set aside.
When your sauce is ready (and your kitchen smells awesome) grab a rectangular baking dish. You’re going to need to have 3 layers of sauce, so just try to dole it out evenly.
1st layer-1/3 of sauce
2nd layer – lasagna noodles. Depending on the kind you buy, this can be like 3 or 4 lasagna lengths per layer (there are 2 lasagna layers in this recipe-so 6 or 8 total)
3rd layer – ½ of the cottage cheese/spinach/egg mixture
4th layer – 1/2 of the shredded zucchini
5th layer – 1 cup mozzarella
6th layer – 1/3 of the sauce
7th layer - lasagna noodles.
8th layer – other ½ of cottage cheese mixture
9th layer – the other ½ of the shredded zucchini
10th layer – the other cup of the mozzarella (leave a little of the mozzarella aside for placement on the top after the lasagna has baked)
11th layer – the remainder of the sauce
Preheat oven to 325. Bake the lasagna covered with tin foil for 1 hour 30 minutes. After 1 ½ hours, take it out, remove the foil sprinkle the bit of mozzarella you set aside and sprinkle some parmesan on top. Put back in the over, uncovered, for about 10 more minutes. Take out, let set for 10 minutes before serving.


