Tuesday, April 29, 2008

A brownie cookie to bow to.

Do you read Smitten Kitchen? It's a very fun cooking blog with good recipes...great banter and some really nice photography of food which is something I'm really into lately. Which is why I'm pitching my husband on a kitchen renovation...you know...for the blog...so that the pictures come out better because our kitchen will be from this decade...as opposed to 1973. The things I do for blog readers, really, I should get a sticker or something.

Anyway, I digress, today on Smitten Kitchen they have this brownie roll-out cookie thing that looks so fantastic that I had to share over here - just in case you weren't in the loop. Now, if you'll excuse me, I have 1 day and 8 hours before my May purchase freeze goes into effect and I have to buy at least 4 new cookie cutters so that I can make these brownie cookie wonders.

Pesto Tuna Salad

This recipe comes courtesy of Caley over at Sublime Bedlam:


I am all for meals that I can get a good run out of. Leftovers are like, my BFF. That's one of the reasons I love making this Pesto Tuna Salad so much- that, and it's easy, AND my toddler will eat it. The first night we eat it in sandwich form, usually on croissants (oh HEALTHY, I know!) (but just as good on a nice fresh sandwich roll), and the second night we mix the leftovers into a big bowl of pasta, usually the bow tie kind.

And I'll be honest- the first time I tried to imagine pesto (which I ADORE) paired with tuna fish (another one of my favorite things... really, there isn't too much that I DON'T like...), well, I turned my nose up, too. But it is surprisingly yummy and I'm so glad I gave it a shot!

Pesto Tuna Salad

1 (6oz) can tuna
1/4 C prepared pesto (I like the Buitoni kind) (Also, I am verrrry generous when I measure this out)
1 tomato, diced
-or-
about 5-7 sundried tomatoes, diced (I prefer them fresh, but I've made both and both are good)
2-3 tbsp mayonnaise
2 tbsp grated Parmesan cheese
1/4 C chopped celery
1 small onion, chopped

Mix all the ingredients together in a bowl and allow to chill in the fridge for a bit. Serve on big, flaky croissants, with crisp Romaine.

Also tastes great topped on Wheat Thins or some such cracker, as a snack.

For the leftovers on the second night, I usually mix in a little more pesto (did I mention I'm in love with pesto?) and then stir it into a bowl of cooked pasta, while the pasta is still warm.

Monday, April 28, 2008

This is a project - Triple Threat Whole Wheat Bread

As a kid of a working mom (which I love by the way, both that she's my mom and that she showed me that working moms can rock) I spent a lot of time with my grandmothers, who were for the most part stay-at-home moms (equally fantastic and awesome). My one Gram can't cook - Gram, if you're reading this, I love you very much and you give the best hugs but you can not cook...I think we all know this. My other Grandma (who won't be reading this because she doesn't understand what going online means) was an amazing baker and a pretty darn good all around cook. My Grandma Teresa made bread ALL the time and we loved it because nothing beats the smell of fresh bread. On Friday's she would make her Triple Threat Bread - she made hers with White Flour - and I've made mine so it's Whole Wheat.

I will say upfront that this is a project - you will not whip this up one night after work (well I guess you technically could if you stayed up late, which I am not capable of doing). Having said that, I have to say it's worth it if you have a 2.5 hour window where you want to be in the kitchen getting your hands good and dirty and you want the most amazing Triple Threat Bread EVER. Why is it called Triple Threat Bread? Because it makes 1 loaf of Whole Wheat Bread, 1 pan of Whole Wheat Dinner Rolls and one pan of Pecan Sweet Whole Wheat Rolls. I've made the White version a bunch of times when I take Friday off because nothing beats a sandwich on fresh bread and then Pecan Sweet Rolls for breakfast and fresh rolls for Saturday night dinner. The whole wheat twist was new to me this time but I have to say it rocks and adds a whole load of healthful reasons to make it. So lets get started:

Triple Threat Whole Wheat Bread


What you need:
Stuff you Need
Group ONE:
4 cups Whole Wheat Pastry Flour (this is VERY important that it's Pastry Flour because regular whole wheat bread would be to mealy)
2 cups Regular Old White Flour
4 Tablespoons Sugar
3 Packets of Active Dry Yeast
3 and a half Teaspoons Salt

Group TWO:
3 Cups Hot Water (up to 130 degrees but not boiling)
4 Tablespoons Butter Melted

Group Three: For the Sweet Roll part you need:
4 Tablespoons Butter
1/3 cup Brown Sugar
1 cup of chopped Pecans (I like a lot so I use the whole cup, if you're not that into it, use less)
1/3 cup White Sugar
1 Tablespoon Cinnamon (more if you like it a lot like I do)

What you do:

  1. Put all the stuff from Group One in a big bowl and mix it up so you can't see what's what. Make a little well in the middle of your bowl so you'll have a place to pour all the stuff from Group Two
    Stuff Mixed Step 1
  2. Pour Group Two into Group One and stir (or use your hand mixer or use your stand mixer) until it forms a ball - this will take about 5 or so minutes
  3. Use White Flour to dust off a clean workspace - have an extra cup of white flour at the ready - your hands will be messy and you won't want to dig for another measuring cup of flour.
  4. Dump the bread onto your clean flour surface and knead for about 4-5 mintues - you'll need to sprinkle the dough with flour frequently because you don't want it to be sticky. Don't know how to do that? See here.
  5. Oil a bowl (I always use a coffee filter for this job because that's how my Grandma did it but I'm sure paper towel would work too) be a little generous because you're going to put your kneaded dough in this bowl and spin it around so it's got oil on all sides. Put Saran Wrap over the bowl.
    Dough Step 5
  6. Put the bowl in a warm place (about 80 degrees) for 30-40 minutes or until it doubles in size. Now I don't have a place that warm in my house but I do have one of those warming spots on my stove so I turn that to low and it works PERFECTLY. I also cover with a warm damp dish cloth because that's how my Grandma did it.
  7. While this is doing its job I do NOT clean up because it's only going to get messy again, I oil the bread loaf pan, the dinner roll pan (I use a cake pan) and I get my Pecan sweet roll stuff together. I also chop vegetables for dinners, read People magazine and read blogs.
  8. Put the Brown Sugar and the butter in a pan over medium heat and stir like crazy until you can no longer hear the granules of brown sugar (it will be bubbly hot). Pour that into the bottom of your Sweet Roll pan and then sprinkle your pecans. I stir together my white sugar and my cinnamon mixture now too.
    Sugar Butter Mixture Step 8
  9. Cut your bread into thirds with a sharp knife. Put 1/3 into your loaf pan and shape it like a loaf of bread, cover it with saran wrap and put it in the warm place again.
    Bread Step 9
  10. The next 1/3 will need some more flour to work into your rolls. I do the dinner rolls next and I use an extra large cookie scoop so that they all work out to be about the same size. Scoop, roll around in your floured hands and then put into your pan. Cover it with saran wrap and put it in the warm place again.
  11. Now you've got 1/3 left. Dump this on to your floured surface again and roll it out into a rectangle. Sprinkle your cinnamon sugar mixture over the entire thing and roll it up. Now I am really bad about making them the same size so first I cut it in half and then in quarters and then so on. Be careful and put them roll side up into your pan (the pecan stuff will be on the bottom). Cover it with saran wrap and put it in the warm place again.
  12. While you're waiting this second thirty minutes, first turn your stove on to preheat at 450 degrees. Then you can do the big clean up because you won't be getting anything messy again. Times up - put all your stuff in the oven
    Getting Ready to bake Step 12
  13. Bake at 450 for just 10 minutes. Then turn your oven down to 375 and back the rolls and the sweet rolls for another 10 minutes or until they are golden looking. Take them out and leave your bread in for another 5-8 minutes (tap the bottom, if it sounds like it's hollow it's done.).
  14. Now my Grandma would flip the sweet rolls over onto a platter because she liked all the good stuff to drip all over the inverted sweet rolls- and I recommend this - I just don't happen to be coordinated enough to do this little move without landing them on the floor...and they taste so good you'll be seeing me eat them off the floor which, if we're being honest, isn't something anyone needs to see.
    Finished Step 14
    Tasty Sweet Rolls
    Finished Step 14

Now, don't you feel accomplished? You made Triple Threat Whole Wheat Bread.


Sweet Roll finished yumm

Saturday, April 26, 2008

Gut-Bustin Banana Muffins

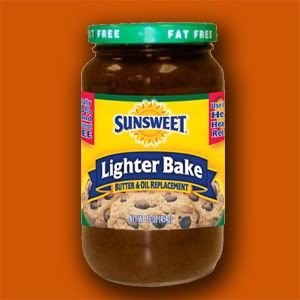
In the last year, I have discovered this:

Photobucket

My first thought was that it would suck and never replace butter, but I've gone through many many jars since then. I use it in all my muffin/bread recipes in lieu of oil/butter and it is so good - moist and yummy without the fat. You can find it in the oil section (usually on the top shelf) in your grocery store. Click on the pic for more info.

I use this in my super healthy banana muffin recipe I concocted to get my picky toddler to get some good stuff down her gullet.

Ingredients

3/4 c. Splenda for Baking Blend (or 1 c. regular sugar)
2 heaping Tbsp Sunsweet Lighter Bake
3 egg whites
2 1/2 overripe bananas (smushed)
3/4 c. FF Stonyfield Farms French Vanilla yogurt
2 3/4 c. whole wheat flour
1 1/4 tsp. baking soda
2 tsp. vanilla extract
1 tsp. salt
1 tsp. ground cinnamon
1 tsp. nutmeg (optional)
3/4 c. chopped walnuts (optional)

Oven to 350.
Mix the Splenda (or sugar) and the Lighter Bake until blended.
Add egg whites, yogurt, vanilla, and bananas. Mix until smooth.
Stir in flour, salt, cinnamon, and baking soda.
Add in nutmeg and nuts if wanted.

Makes approximately 12 muffins. Bake for 25-35 mins or until tops are no longer "gooey."

I did the WW points on this back in the day and they're only 2 pts each and VERY filling.
If you want to add more nutrition, add 1-2 Tbsp of flax seed for added Omegas.

Friday, April 25, 2008

How Kristin makes the pancakes

So Kristin over at Kristins Four Kids was kind enough to share how it is she makes her fantastic pancakes. Maybe I'm the only one that can't seem to make a decent pancake - they are never right, not cooked, over cooked, burned on one side. So I begged her for her help and she was kind enough to share. I have plans for big breakfast tomorrow morning. Do you have tips and tricks to add to pancakes? Favorite toppings? Are you a REAL maple syrup person or a real-enough maple tasting syrup person? On to the good stuff:

This is NOT my (Kristin's) recipe (many thanks to Better Homes and Gardens NEW Cook Book~the red and white checked one). I will however, add some notes at the end.

PANCAKES

What you need:
1 cup all-purpose flour
1 tablespoon sugar
2 teaspoons baking powder
¼ teaspoon salt
1 beaten egg
1 cup milk
2 tablespoons cooking oil

What you do:
a) In a medium mixing bowl stir together the flour, sugar, baking powder and salt. Make a well in the center of the dry mixture; set aside.
b) In another medium mixing bowl combine the egg, milk and cooking oil. Add the egg mixture all at once to the dry mixture. Stir JUST till moistened (batter SHOULD BE lumpy)
c) Heat a griddle or heavy skillet and lightly grease (I use either butter or Pam, then wipe it off. Otherwise the first batch takes FOREVER to cook)
d) Cook over medium heat (don’t do high or they’ll burn) until bubbly, then flip. Serve and enjoy.

NOTES: This recipe doubles easily. For fluffier pancakes, try the following~replace the milk with WHOLE milk (with 15 month old twins in the house, we have it). Then, when you’ve mixed the wet and dry ingredients together, let the mixture sit a few minutes before you start cooking. I also use my gravy ladle to ladle out the pancake batter; gives me a good size without too much mess. In the alternative, I use my ¼ cup measuring cup. All 4 of my kids love the pancakes. I love being a hero on a Sunday morning!

Thursday, April 24, 2008

Taking the Mac Magic out of the Box

If you read my blog you know my love for Macaroni and Cheese is pure and deep. I admit to eating boxes of Velveeta Shells n Cheese. Having said this I thought a good Sunday evening dinner would be Macaroni and Cheese only to discover that I was out of the Magic Boxed wonder. What's a girl to do? Well I decided that with no less then 9 kinds of cheese in our house I would be able to whip up some Mac and Cheese...now I loved Baked mac but I just wasn't in that kind of patient mood. So I decided stove top was the only way to go.

Mac Magic out of the box Stove Top Mac n' Cheese
This is enough for 4 side servings

What you need:
1 Egg
Milk (I use skim)
Dab of Dijon Mustard (you don't want to use too much because it can really overwhelm the flavour)
Paprika
Salt & Pepper
Dash of Hot Sauce (or to taste if you like things nice and spicy)
3 Tablespoons Butter Melted (I used Light I Can't Believe it's Not Butter)
1 slice of Cheddar (really you could use any cheese)
1 slice of Munster
1/2 cup of Colby or Jack
1/2 box of Pasta - I love Elbow Mac's
Mac Ingredients

What you do:

  1. Start your Mac cooking
  2. Mix the egg and all the seasonings and melted butter in a pyrex container - add milk so that it's 1 cup of liquid.
    Mac Mixture - Step 1
  3. Drain your Mac and put back on heat with your liquid mixture over Medium low heat. Stir like crazy until it starts to bubble.
  4. Add in your cheese. You'll think it won't thicken up and then 20 seconds later it's thick and delicious. Now I did get a little Jessica Seinfeld on mine and threw in 1/2 cup of butternut squash puree for some added nutrients but I did that AFTER I tasted it as is and it was just as tasty.
Mac on a plate

Wednesday, April 23, 2008

Marinated Flank Steak in a Bag

This recipe is brought to you by Multi-Tasking Mommy.

One of my comfort foods, in the summer time, is a good bbq'd, marinated flank steak. My Mom used to make this quite a bit when I was younger, and actually continues to do so now! It's an easy and yummy meal for a warm cottage night.

My Mom often serves it with Twice Baked Potatoes (recipe to come soon) and Creamy Cucumber Salad (I'll post this soon too, if people are interested).

My story about this steak though, isn't about how yummy it is OR that it is a great comfort food OR that it is SUPER easy to make.

My story has to do with the last time we made this (only a week ago) and the hubby slipped up a bit!

You see, instead of taking the steak out of the bag in the house and putting it onto a plate, he did the manly thing easy way out and did it right over the bbq. Yes, this would make sense, really--one less dish to wash, right? WRONG! While trying to put the bbq tongs into the bag, the bag accidentally slipped out of his hands and dropped onto the hot grill for a second, searing some nice holes in the bottom of the bag.

Hmmm....

Bag full of marinade + holes + hot bbq = HUGE.SMOKEY.MESS

Yes, we prayed for a brief moment that the whole bbq wasn't going to go up in flames. It was pretty close with a few arm high ones, but luckily, it didn't. We just had a big clean up afterwards and have learned our lesson, right dear ;)

For the record, my hubby is an amazing bbqer!

Marinated Flank Steak in a Bag
1 large zip lock bag (if you're wanting to be environmentally friendly, you could use a 9x13 baking pan, but technically we could zip the bag and put it in the freezer, then dispose of the food portion into our green bin)
1 flank/skirt steak (in Canada, we call it flank, but I believe down south, you guys call it skirt...right?)
a few cloves of garlic, peeled and smashed (you know, with a knife the way the chefs on the food network do it)
equal portions of:

  • soy sauce

  • olive oil

  • balsamic vinegar

  • freshly ground pepper
    a few squirts of worchestire sauce (to your liking)

    Marinate for at least 24 hours and bbq on medium for approximately 30 minutes, or done until your liking.

    Do you know of the Hand Testing Technique for testing when steaks are finished to your liking, right?!

    Monday, April 21, 2008

    Food of the Earth

    I never understood that expression - Food of the Earth...well given that all food is from Earth doesn't that make ALL food Food of the Earth? Oh, the FH told me the expression is Fruit of the Earth...if only my natural hair color was blonde. This Veggie Wrap is Earth Day friendly because you're not using any external energy to make it and it's good and Earthy with lots of Veg. So Happy Earth day.

    Very Veggie Hummus Wrap

    What you need:
    Hummus (see this post - now this Hummus I made with 1 can of Chick Peas and 1 can of Small White Beans because I wanted more beans for protein and fiber for my bun in the oven)
    Wraps (I use the Carb Watch kind that have 9 Grams of Fiber)
    Mozzarella Cheese
    Roasted Red Pepper
    Tomato
    Cucumber
    Red Onion Diced Small
    Lettuce
    Zucchini
    Carrot
    All the Veg

    What you do:
    1. Make the hummus. I recommend adding the white beans here because it makes it yummy with extra protein. Sometimes I add grilled chicken if we have leftovers.
    White Bean & Chick Pea Hummus
    2. Chop up all your Veg - now you obviously don't need all this veg - but it's a great way to use up the veg and get in your daily 8 servings. Put in a big bowl and dump in a good amount of hummus so that your vegetables get coated with your hummus.
    Veg Mixture
    3. Put a bed of lettuce down on your wrap and then scoop in your Vegetables. Wrap it up and ENJOY! It's so yummy and healthy and filling.
    Wrap

    Earth Day Post

    In celebration of Earth Day, I have decided to stop eating meat, throw away all my leather shoes and purses, and no longer shave my pits. HA! Yeah-effing-right! I'd be one stinky, hungry, barefoot b-word.

    Seriously, I love me some meat. And I don't mean the hunky-telephone-repair guy kind of meat, though I'd take some of him on a plate with gravy please. I do enjoy lean beef, fish and poultry, and try and buy organic/free-range when I can. And I've written about how my husband and I take a lot of steps to being green on my other blog. But because today IS Earth Day, I thought we should take a look at some things you can do in regard to eating "greener" and healthier.

    One of the things we did this year was participate in a CSA (community-supported agriculture) where you essentially buy a share of a local farm, and during the growing season you get a portion of their harvest. This is a great way to get locally grown, organic produce as well as support your local agriculture community, which unfortunately is suffering across the nation. And it's a lot cheaper than you think. I'm gonna spill: For a full share, which feeds four-six adults, the cost for the May-October growing season was $570 for us. We split it with another family, meaning it cost us $285 dollars for fresh produce FOR THE WHOLE SUMMER. This share not only includes vegetables, but fruits, flowers, and herbs. Some of these CSAs also give you eggs and sometimes meat. Prices will or course be different in all parts of the country, but I am lucky (read that sarcastically) to live in one of the most expensive counties in our country and it it sill affordable. So, you do the math. Considering I spent over 150$/week at the local market to get decent produce, this will pay for itself within two weeks. And it doesn't get any fresher than 10 miles away. To find one in your area, or learn more about them, go to Local Harvest.

    There are also many other ways you can help "greenify" (Yes, that is a word. I made it up.) your diets, the way you eat, and the way you live (in your kitchen).

    -Here are some tips on how to have an eco-friendly picnic.
    -Don't know what to do with all those greens you bought at the market? Click here.
    -Seen those root vegetables but don't know what to do with them? or even what they are? Click here.
    -Is organic wine really better for you and the envirnonment?
    -Is all that Tupperware you have in your house safe?
    -When should you run your dishwasher? Learn some energy-saving dishwasher tips.

    So tell us: What do YOU do to be green in your kitchen? What are your tips, hints, and tricks to make your footprint on this earth a little smaller (and yummier?) Got any great "green" recipes? Let us know!

    Sunday, April 20, 2008

    Chicken Milano (A twist on chicken parm)

    Thanks to BeachMama for this recipe!

    Her story: This one is my husband's FAVORITE. And it was the last dish I had before I went into labor and ended up not keeping it down. I made my hubby's favorite dish on a Monday since I was supposed to get induced on Wed (so he would have some leftovers while I was in the hospital), but went into labor a few hours later that night. Of course, I also had an ice cream sundae that came back up too.
    I will give you the actual recipe that I got from Easy Everyday Cooking...those cards you get in the mail and stick in a box. In italics let you know what I did a little different. Enjoy!
    CHICKEN MILANO
    Ingredients:
    6 skinless, boneless chicken breasts
    1/2 Cup all-purpose flour
    2 Eggs, beaten
    1 Cup Italian bread crumbs
    (For those last 3 items, just put what you would need to bread chicken)
    1/2 Cup butter or margarine (I fried them in vegetable oil)
    1C Marinara sauce (I use 1 can of canned tomato sauce- yes, canned. That is all the hubby loves)
    1C half & half (I just fill the can from the tomato sauce and use equal parts sauce and 1/2 & 1/2, since we like to have extra sauce to use with our spaghetti)
    1/2 C mozz cheese, shredded (I just sprinkle with as much cheese as I want)
    1/2 C swiss cheese, shredded
    1/4 C grated Parmesan cheese
    Steps:
    1) Preheat oven to 350. Roll each chicken in flour: dip in beaten egg. Roll in bread crumbs to coat well.
    2) Heat butter in large skillet over med-high heat. Add chicken. Cook until browned on both sides, about 10 min.
    3) Mix sauce and 1/2 & 1/2 in a small bowl, reserving 2 Tb. Pour into baking dish. Arrange chicken in prepared dish.
    4) Mix mozz, swiss & Parmesan cheeses in a bowl. Sprinkle over top of chicken. Top with reserved sauce. Bake, loosely covered, until cooked through, about 30 min.
    We serve with angel hair and use the extra sauce. YUM!
    If you want to make ahead: Prepare dish as recipe directs but do not bake. Cover and refrigerate up to 2 hours. Bake, loosely covered, until cooked through, about 40 min.

    ***Editor's note: For a healthier alternative, bake the chicken breasts and use Land O' Lakes fat free half and half (which I swear by)

    Sunshine Sandwiches

    This is our first user submitted recipe post! We're SO excited by how many people wanted to participate with adding there recipes and food stories. So we'll get right to the good stuff. This comes from my good friend Nick (and his Mom), he's not only a terrific person to share a cube with but he's someone I'll stay in touch with forever...he makes really great food and he's always pushing me out of my element in the kitchen and I love that about him. So enjoy! I made this for lunch yesterday and couldn't be happier that the FH is away and that I didn't have to share and for the record I used greek yogurt and it was really tasty.

    Sunshine Sandwiches
    Thanks to: Nick and the rest of the Baldassaro Family

    The back story:
    So the title didn't come from me or from my mom ... it came from whoever she got it from... maybe.. but you'll get why its perfect because its the perfect sunny day smile food and its so delicious. This time of year on a day like today it is perfect for lunch.

    What you need:
    pita pockets - bigger the better
    muenster cheese - two inches of a normal block from the supermarket
    cucumber - 1 large
    alfalfa sprouts - at least 2 containers worth
    fresh tomatoes - 3 or so... there should be a pretty even ratio of cucumbers to tomatoes
    fresh dill
    1 lemon
    plain yogurt (or mayo which is way tastier but way less good for you)

    What you do:

    1. Put the sprouts in a bowl and fill it with water to separate all the seed pods which are annoying and drain. I usually rough chop the sprouts. the a.k.a. name of this sandwich is "sprout sandwiches". sprouts are the main ingredient and they're really hard to mix things into to get a good distribution of ingredients. so cut em up a bit but dont go crazy.
    2. Cut the muenster cheese into little cubes. dice em up really small so they dont clump together and can be easily distributed when you mix later. Add to the sprouts in a big bowl.
    3. Dice the tomatoes as well and make sure you take all the wet mess and seeds out before you add to the bowl. Just like with a good guac you want to keep it as dry as possible so when you add the dressing later it - well this is a drippy lunch but you want to try to keep that dressing on as best you can so you dont need all that tomato water crap.
    4. Peel and dice the cucumbers too... we're talking 1/4" dice here on all these. Don't make a paste for pete's sake!
    5. As finely as possible, chop a considerably generous handful of dill. we're talking this will be close to a 1/4 of a cup of dill when you're done chopping it up. Add to a separate bowl.
    6. To the dill add enough yogurt (or mayo - naughty!) to have enough dressing to cover what you've got in your big bowl. maybe a 1/4 of a cup? you also want to make sure that it is a dressing and not some sort of weird dill pesto looking thing. there's a lot of dill but its definitely not the only player in this dressing.
    7. Add to the dill and yogurt the juice of one lemon.
    8. Mix it all up. And taste. It should be overly flavorful because you're going to be adding it to your big bowl next. If you use yogurt you're probably going to need to add some salt and that as well should be a little overly salty because this is going to season what's in the bowl. You know your way around your own tongue better than i do so take charge and get it done.
    9. Add to the big bowl and mix up your ingredients thoroughly... the sprouts will not be cool with this so do your best to break them up.
    10. Slice a pita pocket thing in half to make two pockets and mix the filling again to make sure you get lots of dressing and fill the pocket up.
    I guarantee you will want more than one pita's worth of this lunch so keep that in mind when deciding whether or not it is a good idea to share this with someone else. Its a good idea to pop the pita in the toaster or the microwave for a few seconds so its a bit more pliable and not breaking up and dripping your dressing all over your plate.

    final step: enjoy this deliciously crunchy slurpy good and good for you (go yogurt people!) lunch.

    Saturday, April 19, 2008

    The Big Breakfast

    Each weekend I do one day with The Big Breakfast. In our house it's nothing too crazy, scrambled eggs (and the trick to good scramples is to never stop stirring and stop cooking 20 seconds before they lose that glossy sheen), english muffins, turkey bacon and fresh fruit.

    Some Sunday's I'll also do a breakfast cassarole/quiche/frittata thing filled with all the vegetables that I purchased because they looked so good. Vegetables in my fridge tend to go throw this change:
    So good I couldn't I leave them in that mean grocery store
    to not looking like what I wanted for dinner
    to not looking so hot
    to oh jeezwhiz if I don't use today I'm going to have to waste them
    to I don't want to waste food. There are hungry children within 30 miles of my house.

    So the question I pose today is do you do big breakfast during the weekend? If you do what do you make?

    Friday, April 18, 2008

    So good you'll stick your fingers in it...

    So, you found us! Thank you for visiting our new site. Now if you've come from my blog you'll have to read this entire post to find out the reward that I mentioned...and if you skim or skip I will totally know....I won't really....but I encourage you to read.

    In my house there are signs if something is truly good. For example if the FH (which stands for Fantastic Husband, which sometimes also does not stand for Fantastic....but anyway) requests to have dinner leftovers for breakfast the next day (like my ChicFunitas recipe, which is coming later this week, I know I'm a tease, have been forever) then I know it's really good. If people see that you've run out of dips and you can see them wondering if it's appropriate to stick there hands directly into the dip bowl to eat the rest of the dip you know it's good. The Triple Play of dips below is SO good you'll stick your fingers straight in the bowl....I've seen it done....and I may have done it.

    Pita Chips with Triple Dip - Hummus, Spinach Onion and Greek Salsa

    Pita Chips:
    You can buy pre-made Pita Chips but if you're like me and you bought Pita bread a week ago thinking you'll totally eat them but left them and now they're on the stale side of fresh you can make them super easy. Take the Pita bread, spray it with Olive Oil Pam (you could also brush on Olive Oil if you were less lazy then me), sprinkle with garlic salt (or onion salt), pepper and paprika - Cut each pocket into 8 pieces - throw on cookie sheet, put in the oven at 300 degrees for about 20 minutes or until crispy....if your chips aren't as stale as mine usually are it will take a few minutes longer.

    Hummus: I love me some Hummus and it's so healthful. You can double/triple up this recipe.
    What you Need:
    1 can of chick peas, strained and rinsed (this is important as that liquid makes for a funky taste)
    4 cloves garlic minced (you can add more or less to taste - if you're not a big garlic person roasted will be less garlic tasting and you'll like that better)
    1/3 cup of Extra Virgin Olive Oil (you want the good stuff here)
    4 Tablespoons Tahini (you can leave it out and it still tastes good)
    1/4 Teaspoon Cumin
    1/4 Teaspoon of Salt
    1/4 Teaspoon Paprika (plus more for garnish)
    3 Tablespoons lemon juice (if you slice into a lemon for this use half of the juice of one lemon)
    What you do:
    Throw everything into your food processor until smooth. If you don't have a food processor - double bag your chick peas and the lemon juice and some of the olive oil and let a kid go to town mushing it (double bag is important because I've seen this mess on my floor and I don't recommend it) then stir in the rest of the stuff with a fork, smushing away as you go - your texture won't be as smooth but the results will still be delicious. Put in a serving bowl and drizzle a teeny amount of Extra Virgin Olive Oil on top, sprinkle with paprika (and pepper if you like it).

    Spinach Onion Dip: I feel like the Hummus is enough work, but you need an alternative for people that don't like Hummus so I adapted the French Onion Dip recipe and it's tasty.
    What you need:
    1 Package French Onion Dip or Soup Mix
    1 16oz Container of Sour Cream (I like the Daisy Dallop commercial so I use that brand - you can go low fat here but not fat free)
    1 Frozen box of Chopped Spinach Thawed and Drained so it's not mushy
    1/2 Teaspoon of salt (you need this to bring out the flavour in the Spinach)
    Handful of chopped chives - I have them in my herb garden so I add them in.
    What you Do:
    Mix it. How much do you love that action. That's it. Well you could always put it in a serving dish...or you could eat it straight from the mixing bowl while you're standing in your kitchen...and when you look down and it's all gone DO NOT blame me.

    Greek Salsa: I made this one day when I realized that I had a whole lot of tomatoes that were in the use it or lose it category. This is an eyeball recipe...so these measurements are not scientific at all.
    What you need:
    4 big tomatoes chopped into little pieces
    1 small red onion or 1/2 a bigger one chopped into little pieces
    1 handful (I know really precise) black olives chopped into little pieces
    1 cucumber (leave the skin on - or at least 1/2 on - the color is great) chopped into little pieces
    1 splash of Olive Oil (doesn't need to be the best stuff here- I always have two grades of OO; expensive because it matters and not expensive because it doesn't matter. In this, it doesn't matter)
    Some Feta Cheese (I happen to like Feta in little doses so I use very little here so the ratio is 8:1 otherstuff:feta but it's all up to you - you'll need less salt if you have more feta)
    Salt and pepper to taste
    Lemon (this is not a "must have" but if you have sliced into one for the hummus throw it in it's fresh)
    What you do:
    Stir. Use the gentle approach here lifting from the bottom of the bowl to the top until it's well mixed. This is really better if you let it sit for a few hours to get good and married and cold in the fridge. And it's SO yummy on grilled chicken the next day.

    There you made it through the Pita Chips with Triple Dip - Hummus, Spinach Onion and Greek Salsa so on to the announcement: Baby Girl's name is going to be Alexandra and we're going to call her Lexi....couldn't you just DIE thinking about the cuteness?!?!?!

    Booze and Cookies: What Could Be Better?

    Do you like liquor? Do you like oatmeal cookies? If not, please go away. You are no longer my friend.

    Here's one of my most asked-for recipes that I normally do not share my secret for. But hell, I need to entice you or something right? Think of this as recipe as the equivalent of a hot date slipping a roofie in your drink.

    I concocted this recipe after trying and failing to find a perfect oatmeal cookie recipe that got ME - you know, the cookie that has everything you ever wanted: a rich flavor, a great texture, a million dollars and a huge -- um, where was I? Oh yeah, cookies. I created this based on experimenting with different flavors and consistencies and I promise you if you make them, people will ask you where you got them.

    Unfortunately, this is not one of my healthier recipes but I promise, I have those, I just have to pull out the big guns first to get you hooked. I'm wearing the matching bra and panties on this date. ;)

    AndreAnna's Drunken Oatmeal Cookies

    Ingredients:
    1 c. white sugar
    1 c. light brown suagr
    1 c. butter, soft.
    2 1/2 c. all-purpose flour
    2 1/4 c. rolled oats
    3 eggs
    1/2 c. kahlua
    1/2 c. Bailey's Irish Cream
    1 c. raisins
    1 tsp vanilla
    2 tsp baking soda
    1 tsp salt
    2 tsp cinnamon
    1 tsp nutmeg

    Directions:
    ***
    Must do the following the NIGHT before: Place the raisins in a bowl and pour the Kahlua over them. Cover tightly (either in Tupperware or with plastic wrap) and let soak overnight. The raisins will absorb the Kahlua and get plump and very hard to resist eating while baking.

    1) Preheat oven to 350.
    2) In a mixer or large bowl, cream together the butter and sugars.
    3) In a separate bowl, combine the flour, salt, cinnamon, nutmeg, and baking soda
    4) Add to the butter/sugar mixture and mix until blended.
    5) Add the eggs (beaten), vanilla, and Baileys to the raisin mixture, and stir together.
    6) Add the raisin mixture to the main bowl.
    7) Add the rolled oats.
    8) Dough will be rather firm. Drop by spoonfuls onto cookie sheet and bake for 8-10 minutes until the edges are golden brown.

    * I find that taking the cookies out when the edges are browning but the centers still look a little goopy is the key. The heat the cookies retain will continue to cook them even when you take them out, so to get a perfectly cooked cookie, take them out 30 seconds-1 minute before they seem "done." Let them sit on the cookie sheet for another minute or so, then take them off the cookie sheet so that they do not overcook. Place them on a cooling rack within 1 minute of removing them from the oven or they can get overcooked, which equals a dry and ucky cookie.

    Remember the Milk

    Sometimes the trouble with cooking and meals as a whole is that you don't remember all the stuff you need to make something. Here's a typical scene at my house:

    CC - I'm making Chicken Teryaki wraps for dinner
    Fantastic Husband - That sounds great
    CC - Shoot. I don't have any Teryaki. Do I go get it or do I come up with another plan at the 11th hour?
    FH - See you in 40 minutes.

    I recently found this online application/tool/godsend called Remember The Milk and for my organizational diva self it was love at first site (get it sight/site). You can make multiple lists, you can add to your lists online at their site, you can install an add-on to your gmail account so that you see the tasks as a right sidebar in your inbox, you can twitter things onto your lists and you can text message things onto your list. I'm sure there are other ways that I just haven't discovered yet...but since adding this into my online repertoire I have to say that I have had fewer Teryaki shortages....and I have even remembered the milk.

    Wednesday, April 16, 2008

    Yo Mama's so Lazy Beef Stroganoff

    I'm not a slow cooker genius...and in truth they kind of scare me because I wonder if they really are "safe" to plug in all day long without supervision...or if I will end up on Dateline for leaving electronics unattended. I weigh my fear against my laziness and guess which one wins? Lazy, shocking right? And let me tell you being lazy never tasted so good.

    Because I didn’t have all the ingredients for the recipe per the internet so I kind of “played it by ear” which has caused a few kitchen fires, a couple of truly awful dinners and a ruined holiday traditionally is not the best way for me to go into a dinner. Never the less I was on a mission to regain my hour so I made my very own recipe: Yo Mama’s so Lazy Beef Stroganoff….and sweet jebus it was DELICIOUS.

    Yo Mama’s so Lazy Beef Stroganoff

    Stuff you Need:
    -Stew Meat (as much as you think you’ll need, aka one of the packages they sell it in at the grocery store)
    -2 cans of Campbells Cream o Mushroom Soup (I used the reduced fat, lower sodium version)
    -1/2 can water
    -1 large onion sliced
    -1 package pre-sliced mini-portobello
    -1 package pre-sliced white mushrooms
    -1/2 package French Onion Dip Mix
    -2 dollops of Cream Cheese (optional)
    -Egg Noodles
    ***Buy those Slow Cooker Liner Bags - I used them for the second time (the first time was on chili) and I love them.

    Step One: Line your slow cooker with the cooker bag and turn on to Low. Dump the Soups in the slow cooker. Fill up one of the cans 1/2 way and dump in.
    Step Two: Dump in your onion and 1/2 of each of the mushroom packages and the french onion soup mix and finally the Meat
    Step Three: Put lid on, don’t bother to stir. Take a nap and ignore for 5-8 hours
    Step Four: Stir and then add the rest of the mushrooms and the 2 dollops of Cream Cheese on top. Ignore again for another hour.
    Step Five: Make your noodles and smother in this delicious mixture of yummy.
    Step Six: Freeze leftovers and then the best part is throwing out the mess in the bag and just putting the slow cooker away. Not seeing the slow cooker soaking in the sink for 4 days while you pretend it’s not there is such a good feeling.